

How to set up Dante audio networking in your worship ministry
In this article, I show how you can use Dante networking so that you can send multi-channel, low-latency digital audio over an ethernet network.
It’s a great system and using this in our own ministry has so many advantages. We’ve been able to:
Simplify our entire tech setup
Use Dante to send audio to and from computers running Ableton Live, Mainstage and our front-of-house mixing console
Eliminate the need for audio interfaces
Get high quality audio with very little latency
Our original setup:
Before we used Dante, we had to spend so much time on Sunday mornings connecting and setting up our complicated audio system.
We were going from the USB port on the computer > audio interface > an analogue snake > our stage box > front-of-house console
Just writing it out is exhausting.
But once we started using Dante, things got so much better.
Now:
The audio signal is digital.
And we don't use any interfaces for our Ableton Live or Mainstage rig.
Instead, we created a Local area network (LAN) consisting of just ethernet cables and switches which can send a high band width amount of audio really fast.
Now, we’ve simplified the process from 5 steps to 3 steps:
Audio goes from USB-C ethernet dongle on the computer > Ethernet network > then straight into the sound console.
How to create the Dante Audio Network at your church
Now let’s dive into the gear and software you need for setting this up for yourself.
Gear
1. Dante Soundcard app for your front-of-house mixing console
We bought the Dante Soundcard app that works with the x32 and m32 line of consoles which costs around $600.
It’s expensive, but totally worth it.
This card transforms your digital mixing console into a Dante enabled device so that when you plug the Ethernet cable into that console, it shows up on the Dante network.
Once the console is in the Dante network, you can start easily routing audio to and from all the other devices you have on the network.

This system doesn’t work over Wi-Fi so you need to create a LAN using network switches and Ethernet cables.
Network switches are fairly inexpensive–we got two of them $15 each.
We put one at our tech booth, one up on the stage and that gave us all the flexibility and ports we need to network these computers.
Then you're gonna want to get some Ethernet cable to connect everything. Cat 6 cable will work just fine.

3. Dongle
Finally, if you have an all Mac ecosystem like us, you'll need a few dongles to make sure you can go from USB-C to Ethernet or Thunderbolt to Ethernet or even USB to Ethernet.
Just make sure you have all the appropriate dongles to plug in the Ethernet cables into your computers since they no longer create Ethernet ports on computers anymore ¯\_(ツ)_/¯

Software
This is a free app that you can download from the Audinate website.
This allows you to see all the devices on the Dante network and then start routing channels to and from the different devices.

2. Dante Virtual Sound Card App
The next thing you’ll want to get is the Dante virtual soundcard.
Think of it as a virtual audio interface. It allows you to route up to 64 channels of audio to and from whatever computer you have this app installed on.

Finally, you’ll want to get the Dante Via app.
This one isn't completely necessary, but what's cool about the Dante via app is it’s flexibility. It can send audio directly from applications like ProPresenter anywhere in the Dante Network.
For our setup, this means we don't have to plug our laptop into our sound console using the headphone jack on the computer.
Instead, we can actually send digital audio from ProPresenter straight into our front-of-house mixing console.

Getting the system up and running
Now we’ll connect all of this and get the network up and running.
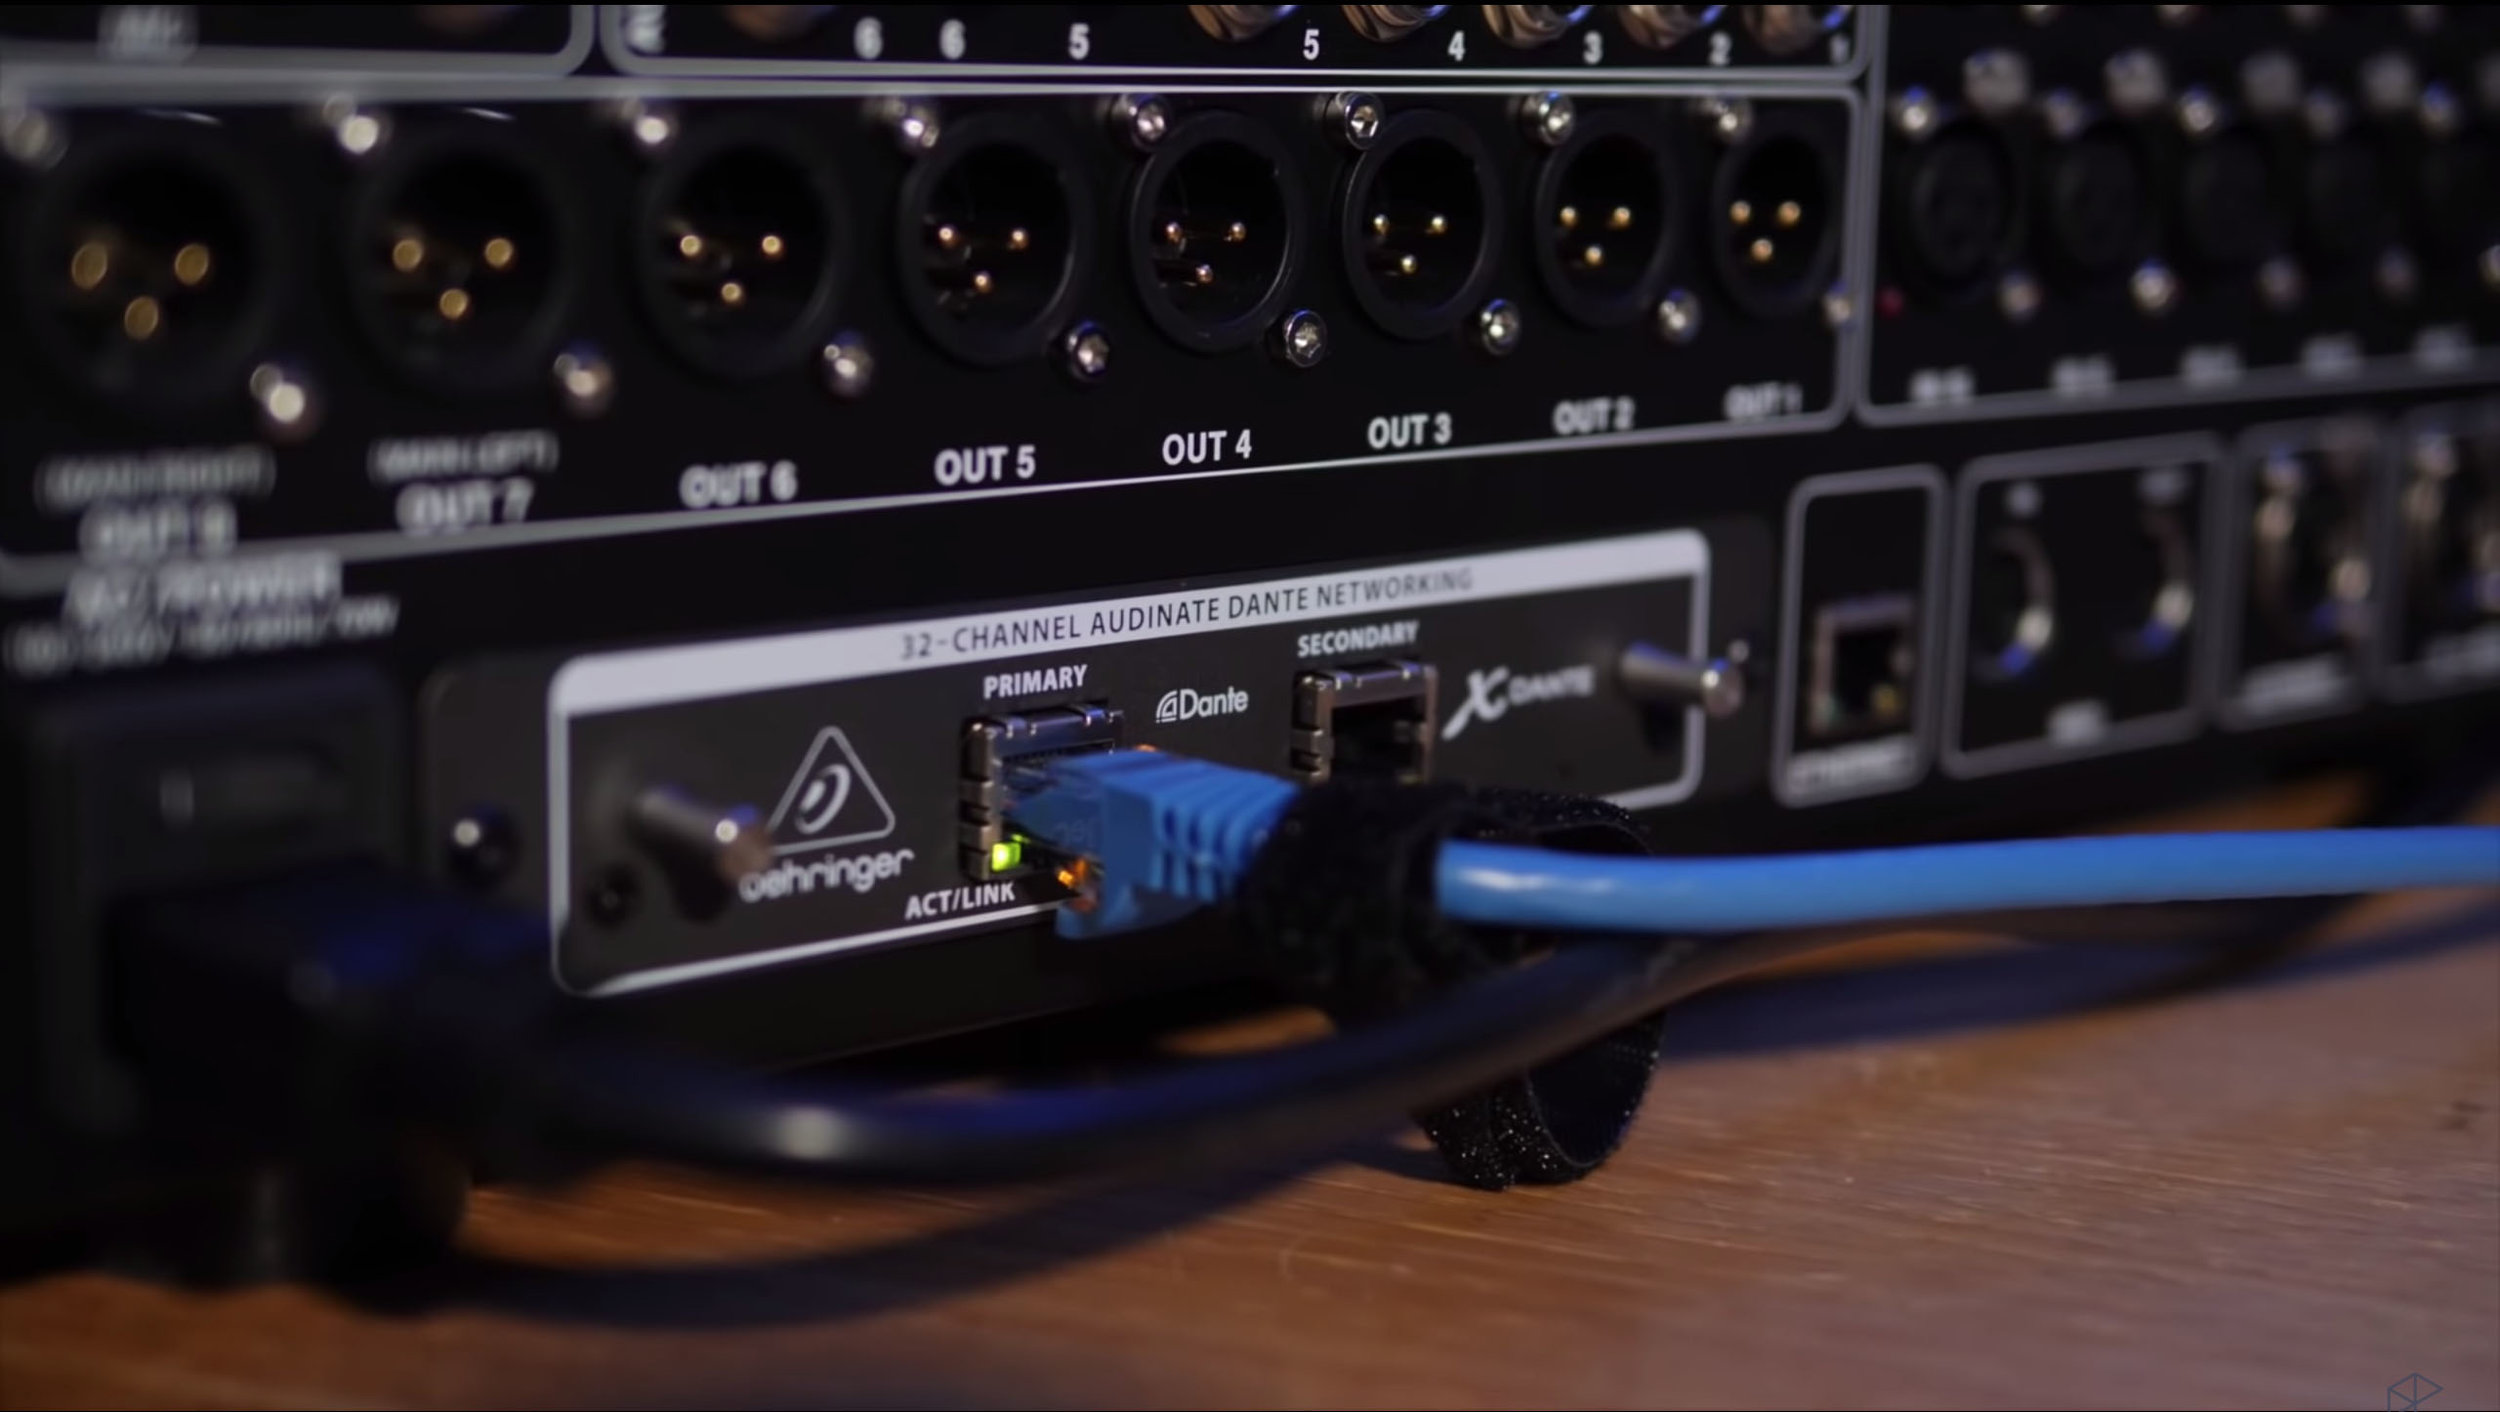
1. Install the Dante sound card for your digital mixing console
This only took me 5 minutes. Just pop our the existing sound card and put in the new sound card.
This sound card also gives you 2 Ethernet ports. That allows you to create a backup system for your audio.
In our case, it’s not super necessary because Dante is really reliable and we just stick with the primary one.
2. Install the Soundcard app or Via app on all the computers that you want on the network
The next step is to make sure you have either the Dante virtual sound card app or Dante Via installed on all the computers you want on your network.
After it’s installed, use your network switches in your Ethernet cables and your dongles plug everything in make sure it's all plugged in together on that same local area network.

3. Configure the way you want the sound card app to function on each computer
Just go to the Soundcard app and configure:
How many input and outputs do you want?
How much latency?
Then select the correct LAN within the Souncard app so it knows where to send all that audio.
Then just hit, Start in the app and your virtual Soundcard is functioning.

4. Select the input and output devices on the computer running Ableton Live
On the computer running Ableton Live :
Select Preferences > Audio > Select the input and out > Choose Dante Virtual Soundcard for both Input and Output
You can also configure your outputs if you’re going to run them all in mono, stereo or a little bit of both.
For our setup, we keep it simple with four outputs going from Ableton Live to our front-of-house mixing engineer.
Channel 1–Clicking guide
Channel 2–Bass heavy tracks
Channel 3 & 4–All of our other tracks in stereo

5. Select the input and output devices on the computer running Mainstage
On the computer running Mainstage:
Open the Dante Virtual Soundcard > Select just 2 ins and 2 outs > Select the lowest latency > Select the right network > Press Start on the app.
In the Mainstage software:
Select Preferences > Audio Devices > Select Dante Virtual Soundcard as your output
6. Select the input and output devices on the computer running ProPresenter
On the computer running ProPresenter in the sound booth:
Instead of using the Virtual Soundcard app, we just use Dante Via
Once you have the network selected in Dante Via, Select which app you want to enable on the Dante network > Select ProPresenter

When you look at your Dante network using the Controller App you can see that ProPresenter shows up as an option

7. Configure everything on the computer running the Pro Tools rig
Our last computer is our Pro Tools rig.
We're just sending all 32 channels of audio out from our front-of-house mixing console to the Dante Network and then it goes straight into Pro Tools.
In Pro Tools software:
Select Dante as the Audio Engine > make sure you have all of your inputs routed to the proper tracks.

Once you have all these devices up and running and they're on the Dante network, then you can spend some time making these configurations in the Dante Controller app.
10. Configuring the Dante Controller app
In the Dante controller app you’ll see two lists:
Dante transmitters–Lists devices that are sending audio out.
Dante receivers–Lists devices where audio can be routed into.
You just use their intuitive grid to tell it that you want:
These 4 outputs from the Ableton Live computer to go into these four inputs on our front-of-house mixing console.
And then you just repeat that same process for all the devices you have on the network

Here’s how we have the card input configured on the digital sound console:
For the inputs–the audio coming in to the board–we have it routed so that we're using our digital stage box. We have a 32-channel digital stage box–but we're only using the first 3 banks of 8 channels. That gets us to 24 channels of inputs coming from that stage box.

I reserved the last selection for card input 1-8 so we're only using the first 8 channels of our Dante inputs that we have for the sound console. That gives us plenty of channels we need for Ableton Live, Mainstage and ProPresenter.

Here’s how we have the card output configured on the digital sound console:
We have the same thing channels 1-25 on our stage box. They’re are going straight to the card output to go into Pro Tools.
And then for card output 25-32 we're just sending those 8 channels from the digital card–the 8 channels coming into the digital card.

Recap
It may be a little hard to wrap your mind around all this, but once you get it up and running, you’ll be able to customize it to fit your worship ministry needs.
I’d love to hear from you on my Churchfront YouTube channel about your tips, tricks and advice for getting this up and running.
If you want to learn more about the tech side of worship ministry, check out Worship Leader Tech School which provides online training for worship tech teams.
You’ll find a wide selection of courses led by me and other experienced teachers. As a part of this community, you’ll be able to personally connect with us during our office hours and with other members to discuss your ministry needs.
I’d love to connect with you and chat about how we can help you grow yourself and your team.