

If you want to capture a professional sounding recording of your worship band then you need to capture a multi-track recording.
A multi-track recording gives you the ability to capture all the individual vocal and instrument tracks within your worship band, so that in post-production you can process those individual tracks and then mix them all together so it sounds professional.
Thanks to digital mixing consoles becoming much more affordable and accessible, it’s easier than ever to capture a high quality multi track recording for your band.
Below, I guide you through setting up all the gear and software you need to get this up and running for your church.
1. Digital Mixing Console
The first thing you’re going to need is a digital mixing console. I always recommend going with the Behringer X32 line of digital consoles.
At our church, we use the Midas M32 R digital sound console along with the Behringer S32 digital stage box.
Since both our console and stage box are digital, it makes it so much easier for routing all of our channels and recording them.
Setting up routing options for multi-track recording
If you're using the Behringer X32 or Midas M32, here's how you can figure the routing options on your console for multi-track recording.
On the mixing console: Settings > Set Up> Card tab > Configure how you like.

If you need to send out 32 channels from the console, just select that top option of 32/32 so you can send 32 out of the board and you can also send 32 back into the board.

If you don't need that many channels of audio going in and out you can select the appropriate option for you.
2. On the sound console: Routing > Card Out tab
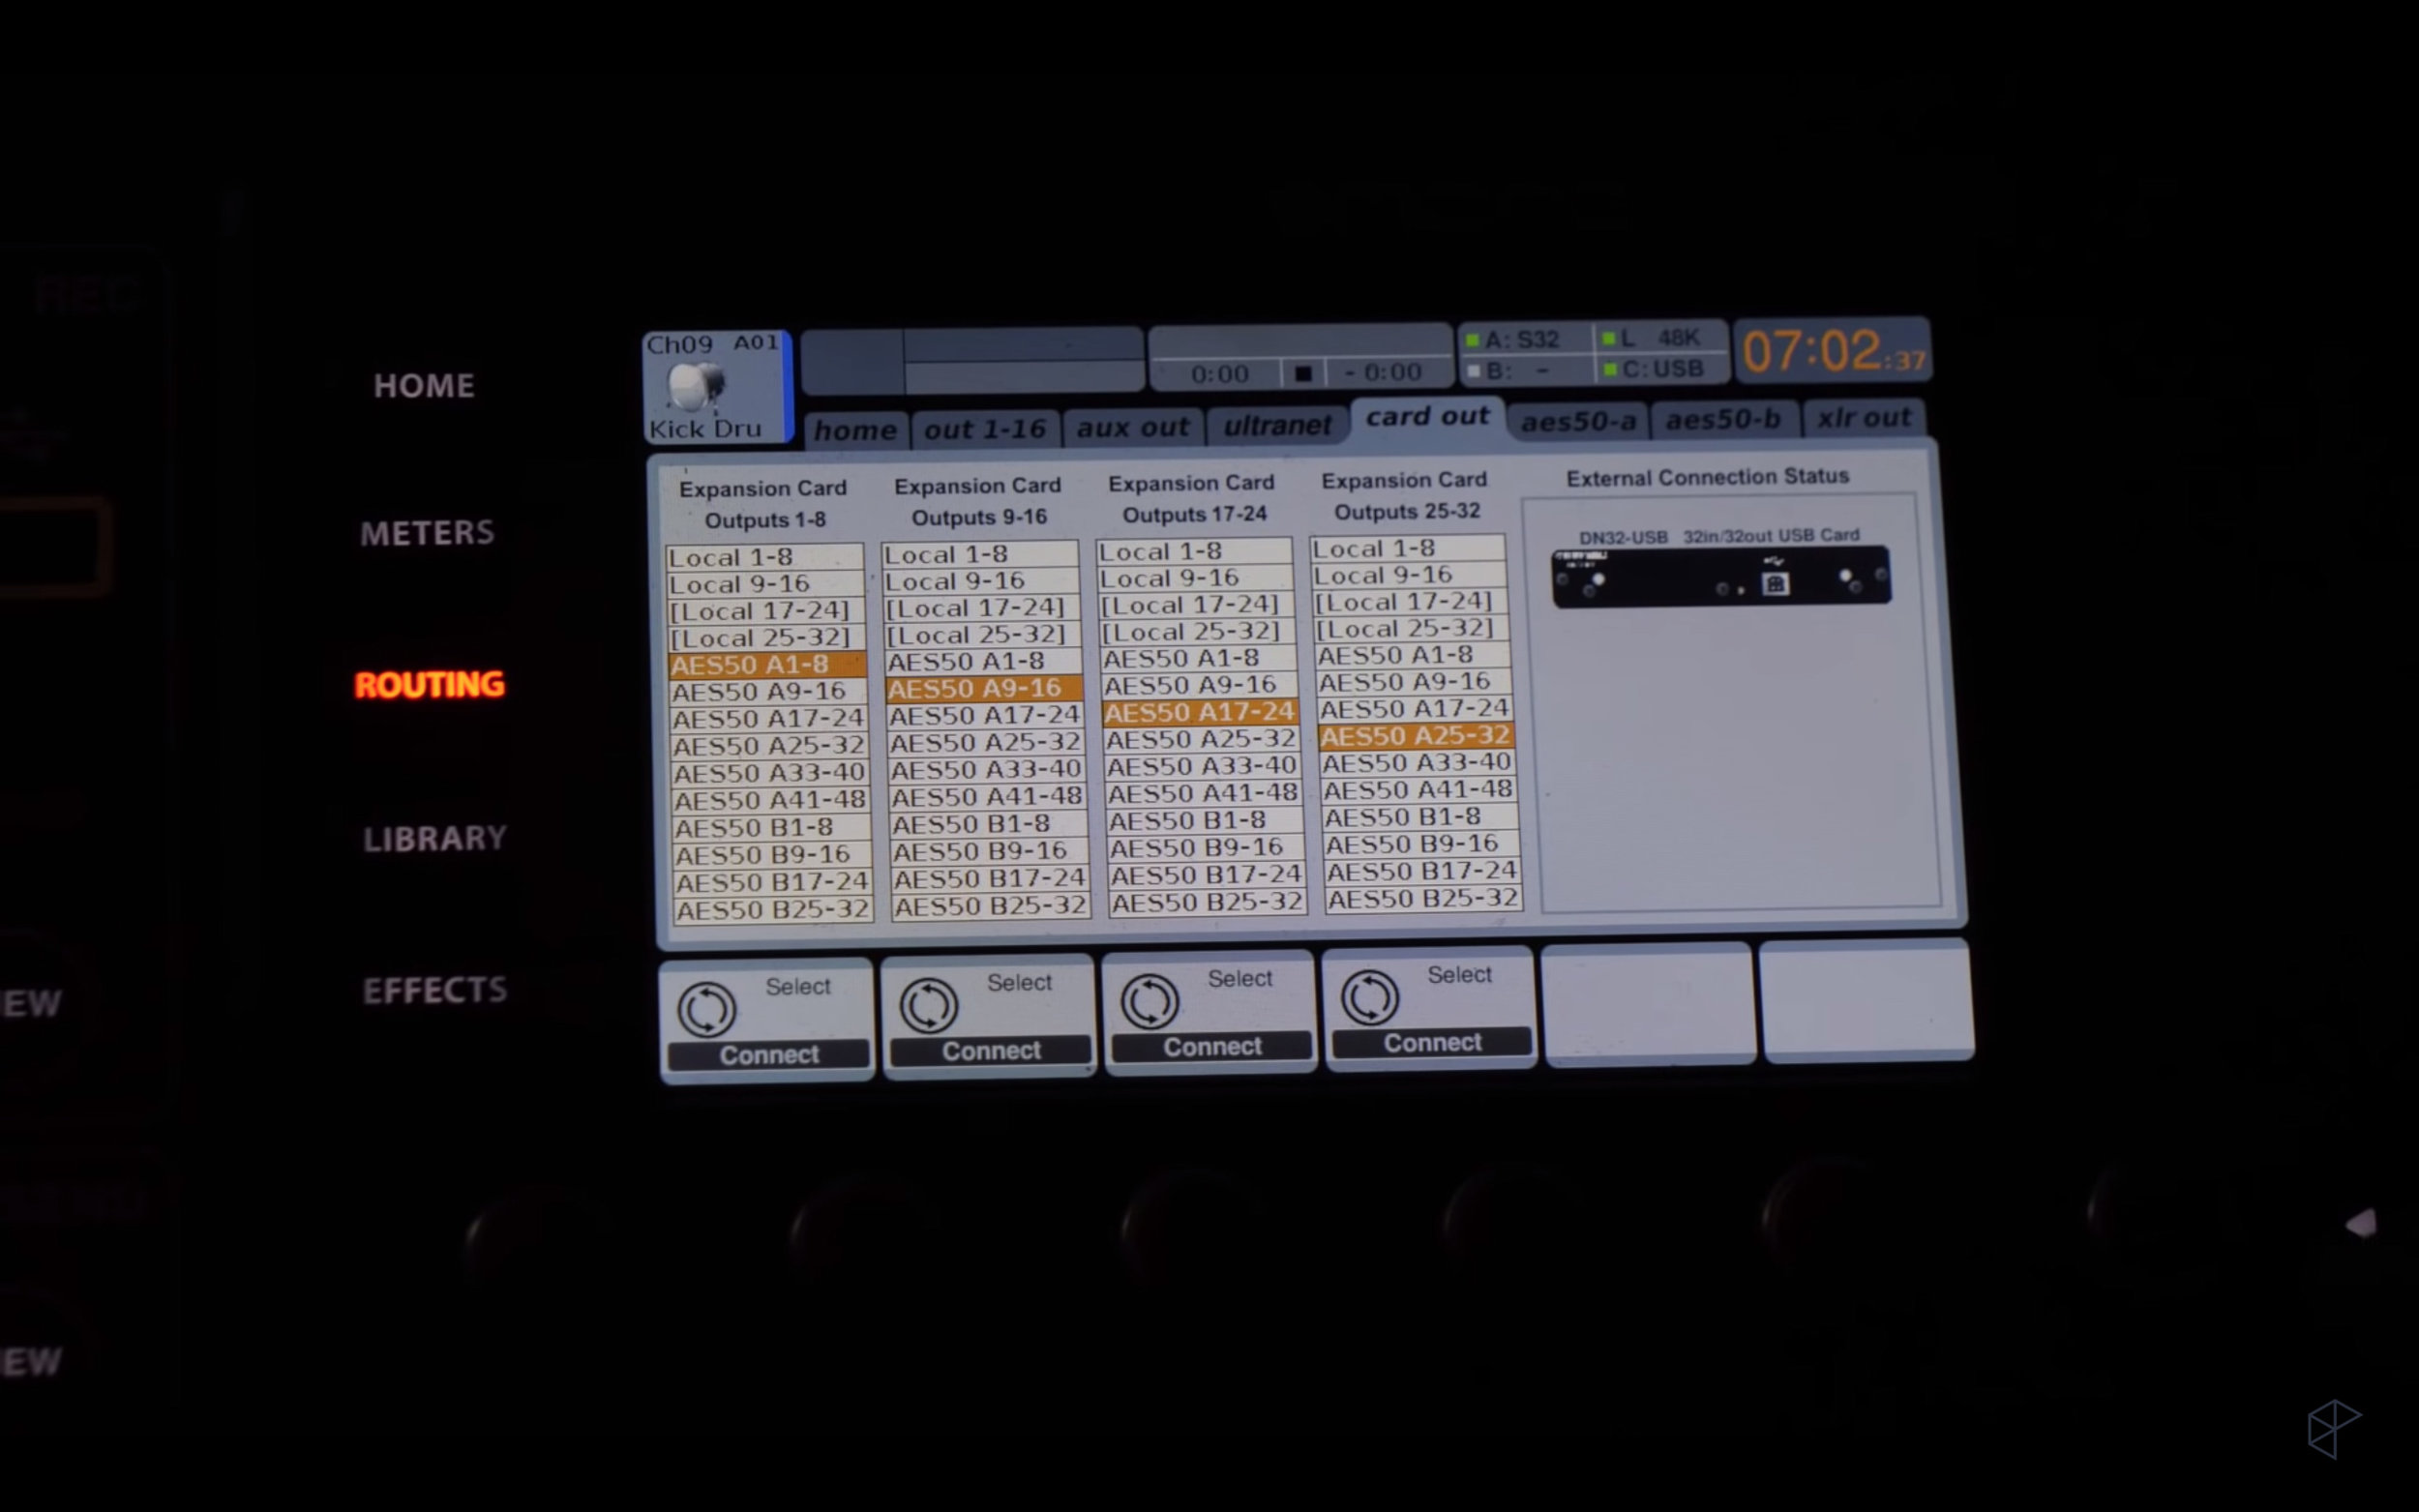
What is Card Output?
To do this set this successfully, the card output settings are really important to understand.
Your digital console is basically an audio interface that has up to 32 channels of inputs or outputs.
What's really cool about these mixing consoles is you can assign different groups of channels coming into your sound console to the different card outputs that are going to your computer.
For example, if you had all of your vocal mics and instruments plugged directly into the local XLR inputs on your mixing console, then you would simply just assign those card outputs to be local 1-8, local 9-16 and so on.
At our church, we plug in all of our vocals and instruments into our stage box.
On the routing options below, you can see that it labels the stage box inputs as AES 50 1-8, 9-16 and so on.

When I assign the card output to those groups of channels, our computer will capture all those inputs going into our stage box, not the inputs going directly into the sound console itself.
It's really important to understand this routing before you move on because you need to know what instrument or what vocal is going into which input.
Once you have those settings configured on your mixing console, you're good to go when it comes to the console.
2. Computer and recording software
Now let’s talk about the computer and recording software you need for this setup
Laptop
We use my older 2012 Mac Book Pro with 16GB of RAM, a quad core processor, and it works just fine.
Software
We use Pro Tools to capture our recordings.
I found that this combo works great as long as we're not running a whole bunch of plug-ins with Pro Tools when we're trying to capture 32 channels of audio.
Setting up your computer with the mixing console
The first step is to make sure the computer is plugged into the mixing console via the USB cable. Once that happens, your digital mixing console basically becomes a glorified audio interface for your computer.
Then, in order for Pro Tools to capture that audio coming in from your sound console, you have to tell Pro Tools that your sound console is going to be your playback device.
In Pro Tools: Set Up > Playback Engine > Select the mixer for your audio device.
Track> New > Create however many tracks of audio you need.
Then assign all the inputs for the track. Make sure input 1 goes to track 1, input 2 goes to track 2 and so on.
Finally, rename all your tracks appropriately.
Pro tip: I highly recommend creating a project within Pro Tools that can be your template so you can open up the template file that has all the tracks, input configurations are all named properly and all you have to do at the end of the service is save the project as a new file.
Before the worship service starts, we make sure all of the tracks are record enabled and then we hit the record arm button in Pro Tools. Hit play and now it is recording multi-track.
At the end of the service, we have a full multi-track recording. Usually I'll just balance out the sermon audio for the sermon podcast and then I can decide what I want to do with all the band multi-track audio.
Recap
I hope by now you have a ton more clarity on how to get this set up up and running at your church.
The key is make sure you have one of the latest digital sound consoles at your church and then make sure you have a dedicated laptop with a professional digital audio workstation like Pro Tools or Logic or Ableton Live.
If you want to continue growing as you lead your tech ministry, I’d like to invite you to check out Worship Tech School.
As a part of this, you’ll get access to:
✅Essential training and classes to grow and operate your tech team
✅Specialized insight from me in our group coaching sessions
✅A community of other Worship Tech School students
So check out the course library, sign up to join and we’ll connect.