
Controlling Lightkey with ProPresenter is an incredibly fast way to ensure that your lyrics, lights and other elements are perfectly timed and synced. Having clean transitions between these various elements is a simple, but powerful way to create a beautiful worship service that fully immerses your church community.
There are different pieces that need to come together, but I’m going to show you a straightforward method on how to get each element talking to each other to control Lightkey with ProPresenter.
1. Turn on Midi Module
Go to ProPresenter Preferences > Modules > Demo Modules

2. Once you’ve done that, the Midi module will show up in the Communications tab, and it’ll be ready to go.

1. Set up the IAC Driver
Next, you want to set up the Inter-Application Communication (IAC) driver which is at the core of this setup because Propresenter and Lightkey talk to each other via the IAC driver.
Go to Audio MIDI Setup app on your Mac > Window > Show Midi Studio > IAC Driver > Create a new IAC Driver Bus.

There are a lot of windows here. Just pull up MIDI studio and then hit IAC driver.
2. Name the bus and call it “I Want to Join Worship Leader School” > Hit Apply.
2. Make sure ProPresenter Will Send Out Midi Signals
Now let's make sure that ProPresenter is able to send out MIDI signals. Because we're sending signals from ProPresenter to the IAC driver and then into LightKey, we need to make sure that the preferences are set right for ProPresenter.
Go back to the Communications Module > Add Device > MIDI > select the proper destination(which is I Want To Join Worship Leader School) > Save > Hit the Connect button.

2. Now ProPresenter is able to start sending MIDI output. You're good to go on ProPresenter's end.
3. Make sure Lightkey receives from ProPresenter
Since Propresenter is sending signals to the MIDI Driver to Lightkey, we need to make sure that Lightkey will receive the commands from ProPresenter by setting up Lightkey’s external control.
In Lightkey, go to Preferences > External Control > Inputs.
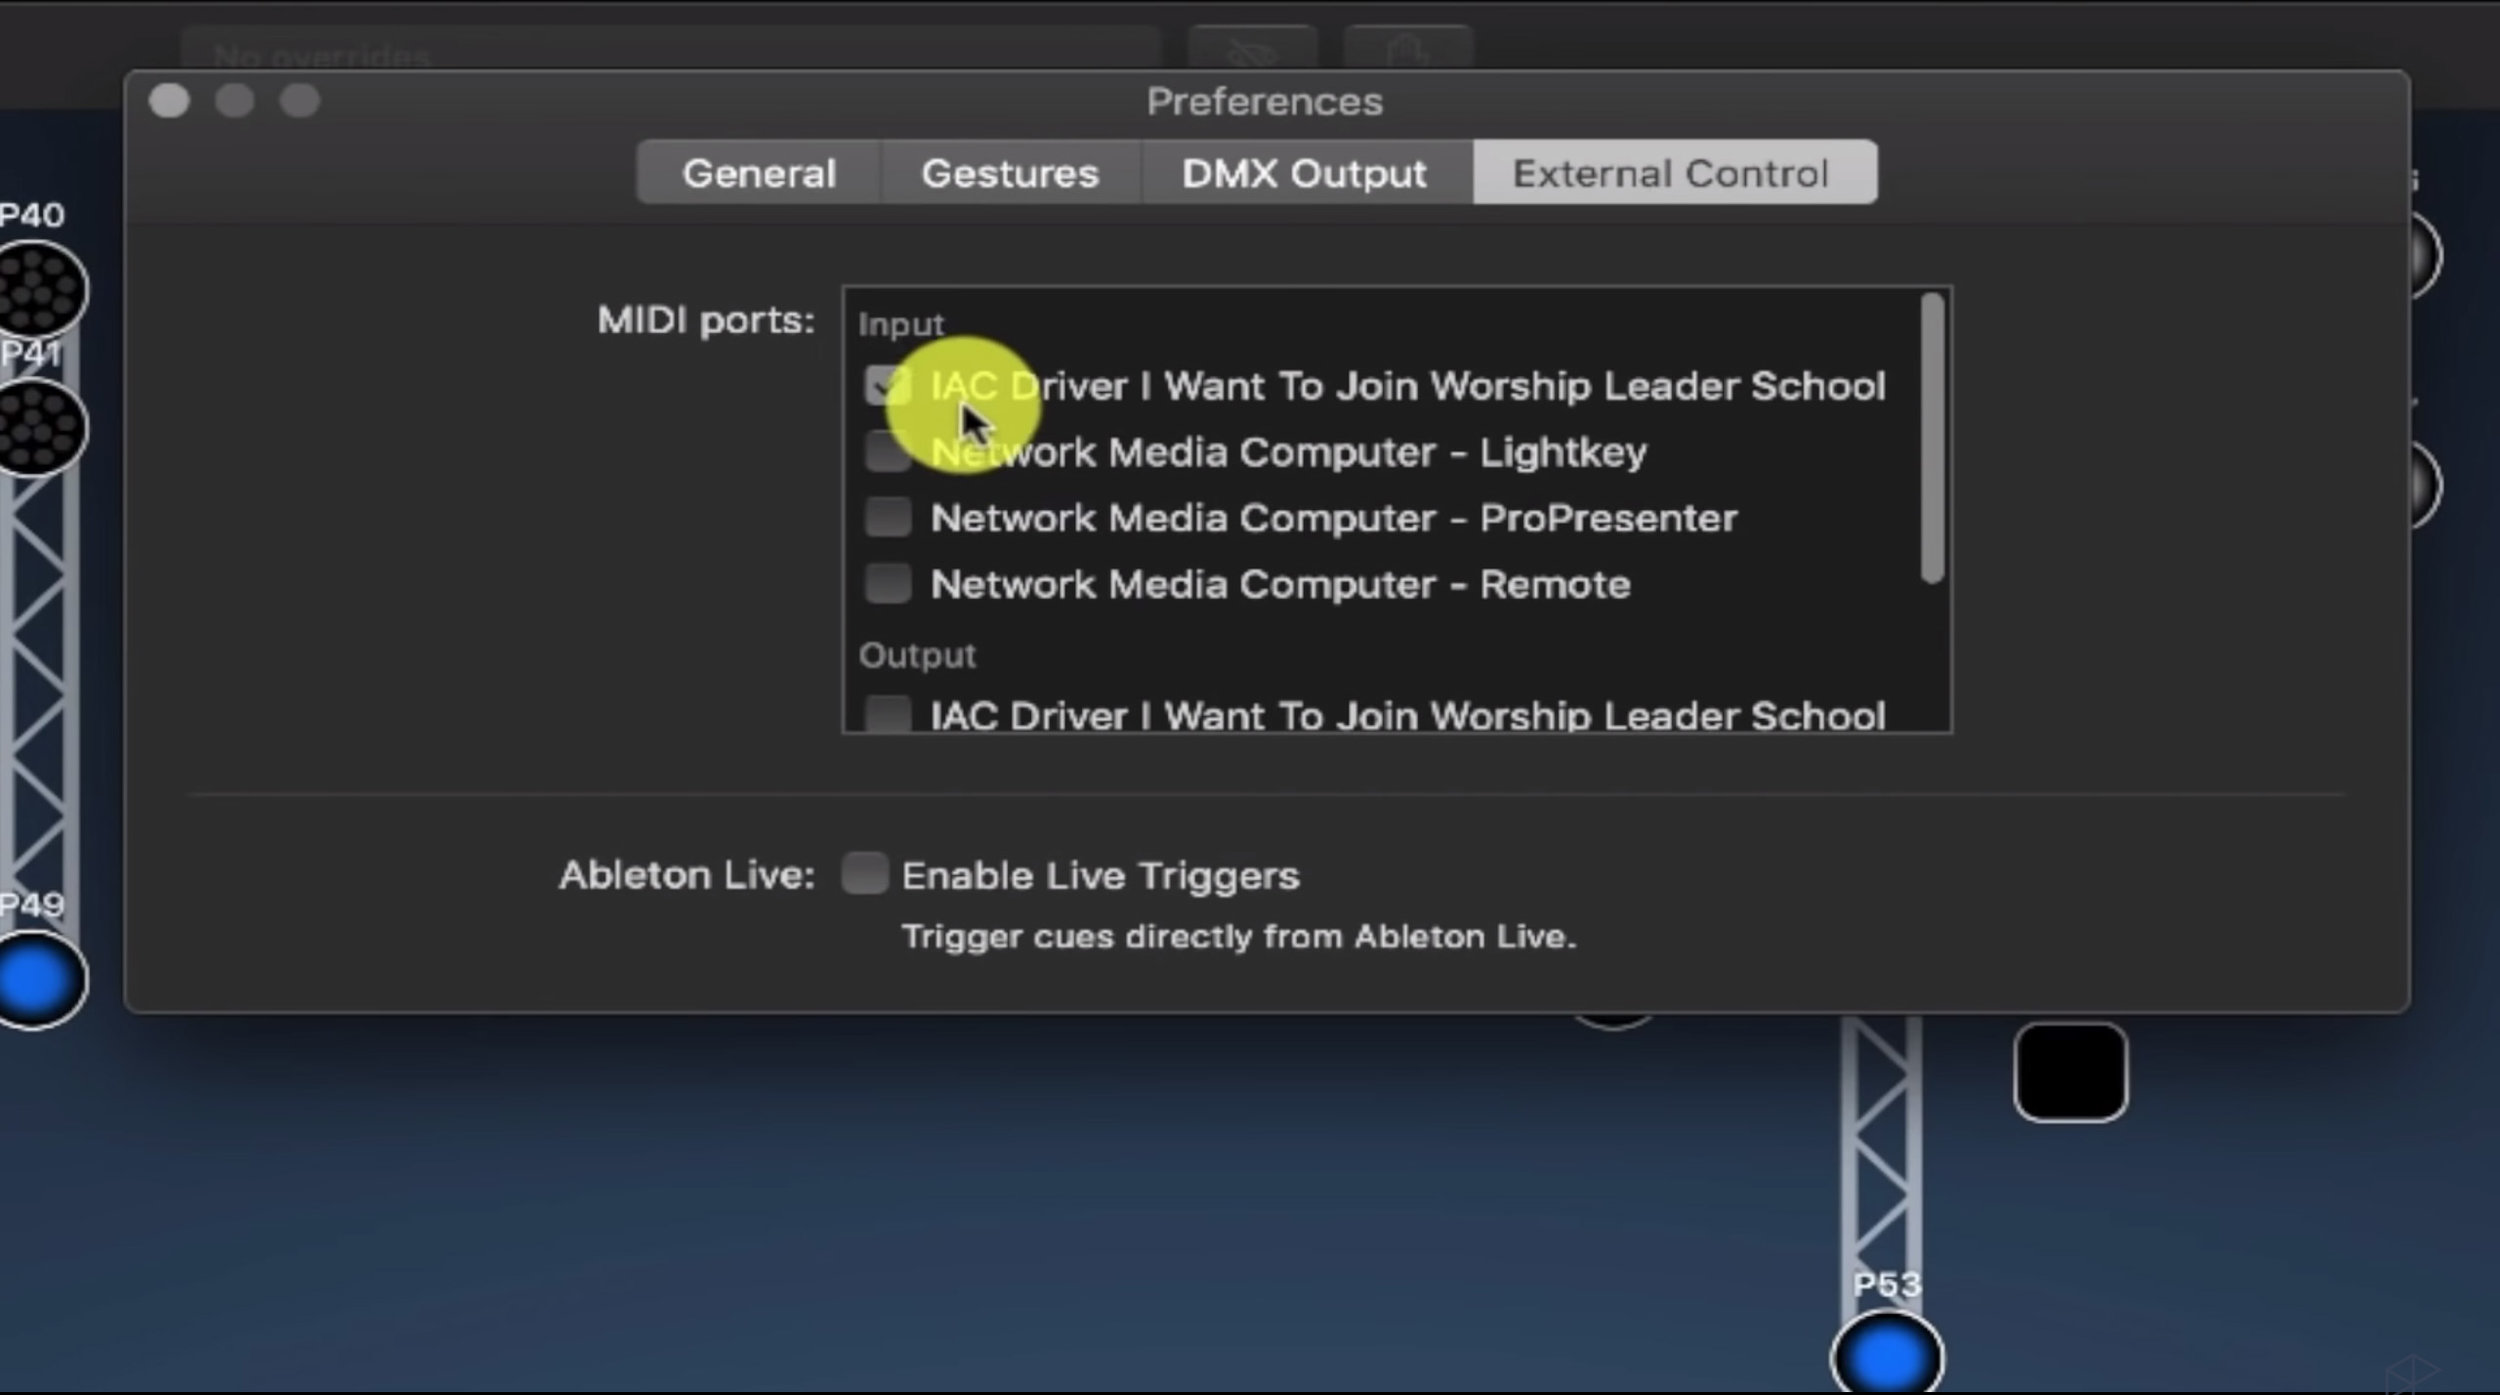
2. Select the IAC Driver I Want To Join Worship Leader School. (Make sure it’s under the Input section.)
3. Now LightKey can receive those MIDI commands from the IAC driver, which is receiving MIDI commands from ProPresenter.
Protip: If the IAC Driver doesn’t show up on the first go in Lightkey, restart the program and then it’ll show up.
4. Assign midi notes to the different cues within Lightkey
The next thing you need to do in LightKey is make sure you have MIDI notes assigned to the different cues within LightKey.
I have a Ableton project that sends notes over to LightKey because we automate all of our lighting changes. If you need to set this up for the first time all you need to do is:
In Lightkey, go to Create a New Cue > Make A New Button > Call it Cue 1
Then, go to External Control window > Hit the Plus icon, and you'll be able to add a new note.
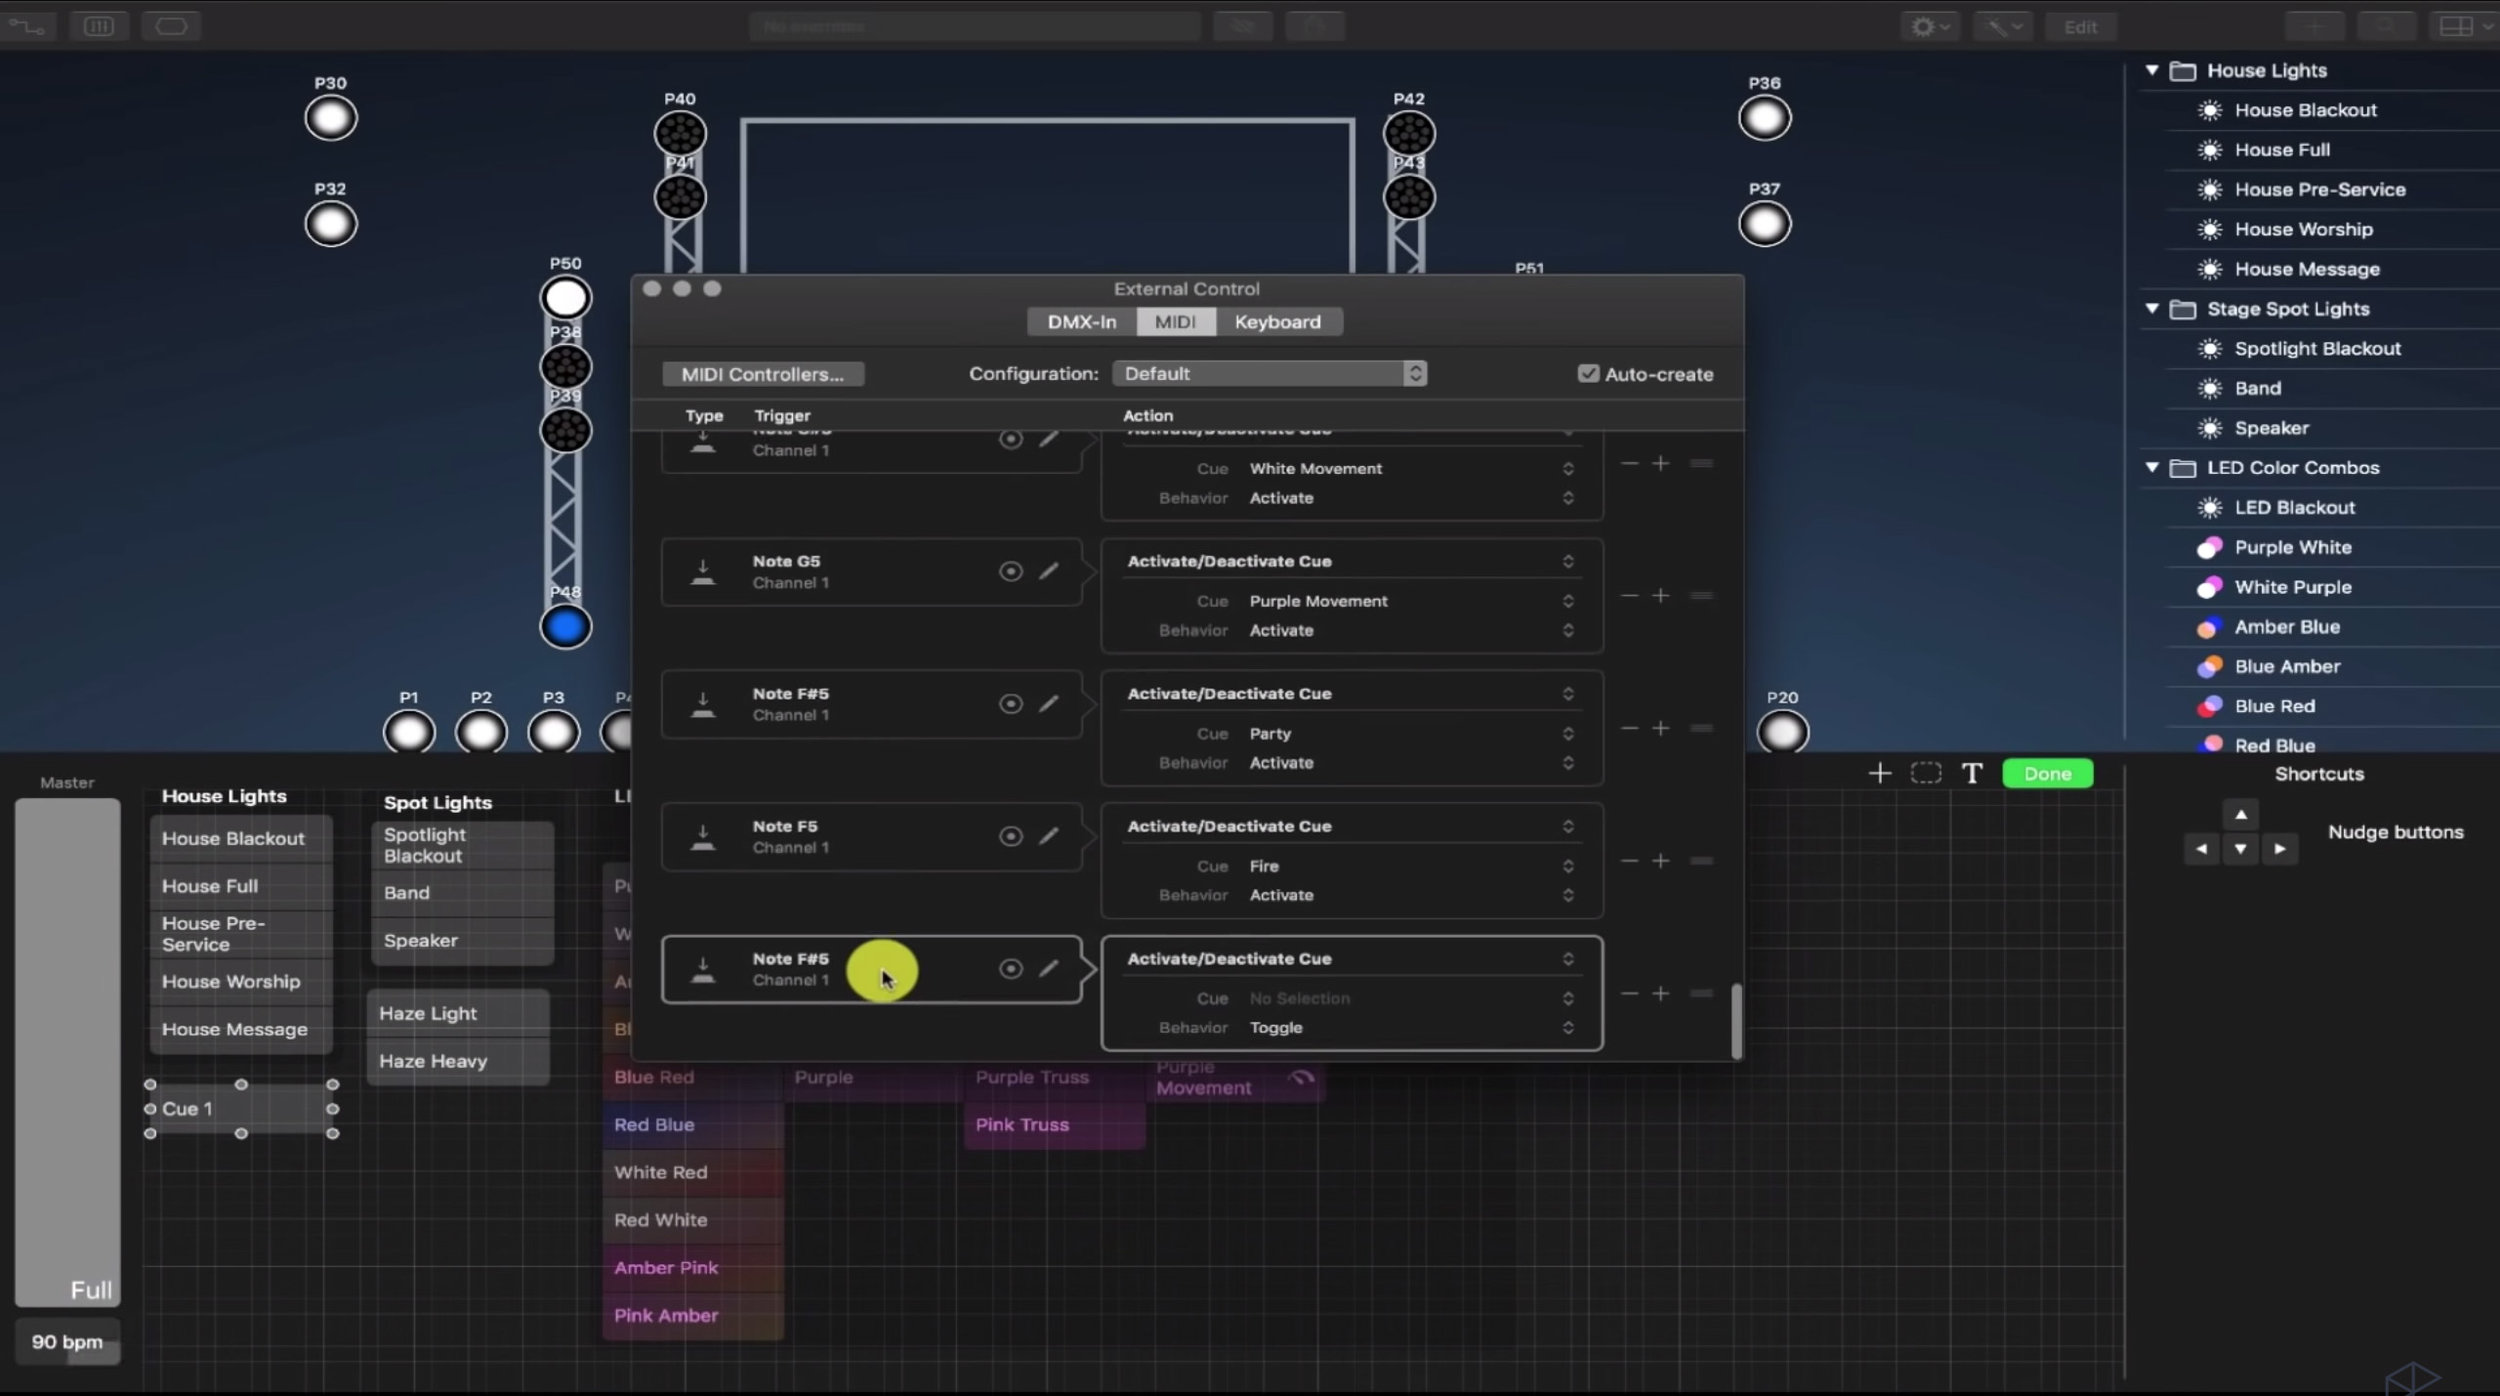
3. After you add a new note (on the left side of the window), go to Activate/Deactivate Cue (on the right side of the window).
4. Select the cue you want to add (in this case Cue 1).
5. Set the behavior as Activate.
6. So any time Lightkey receives the F#5 note, Cue 1 is going to be activated.
Creating a look for the song King of My Heart
So now let's say we want to have a certain look for the song King of My Heart.I'm going to tell ProPresenter to send the right MIDI note to LightKey to cue up the right scene.
We need to make sure to select the scene we want in Lightkey. We want Lightkey to turn the lights onstage to purple. So In this case we’ll call the scene the Purple scene .
Then we need to find the scene’s Midi Control Name
Right click Purple > External Control > the name, D5, is at the topThen we’ll go to ProPresenter > Right click on the first slide > Add Cue > Add Communication Cue > MIDI > MIDI Note On > Then I'm going to tell it to be D5.

4. Then you can set the intensity to whatever you want.
5. Now you can click on the slide in ProPresenter and watch as the Purple lights are activated on stage in Lightkey.
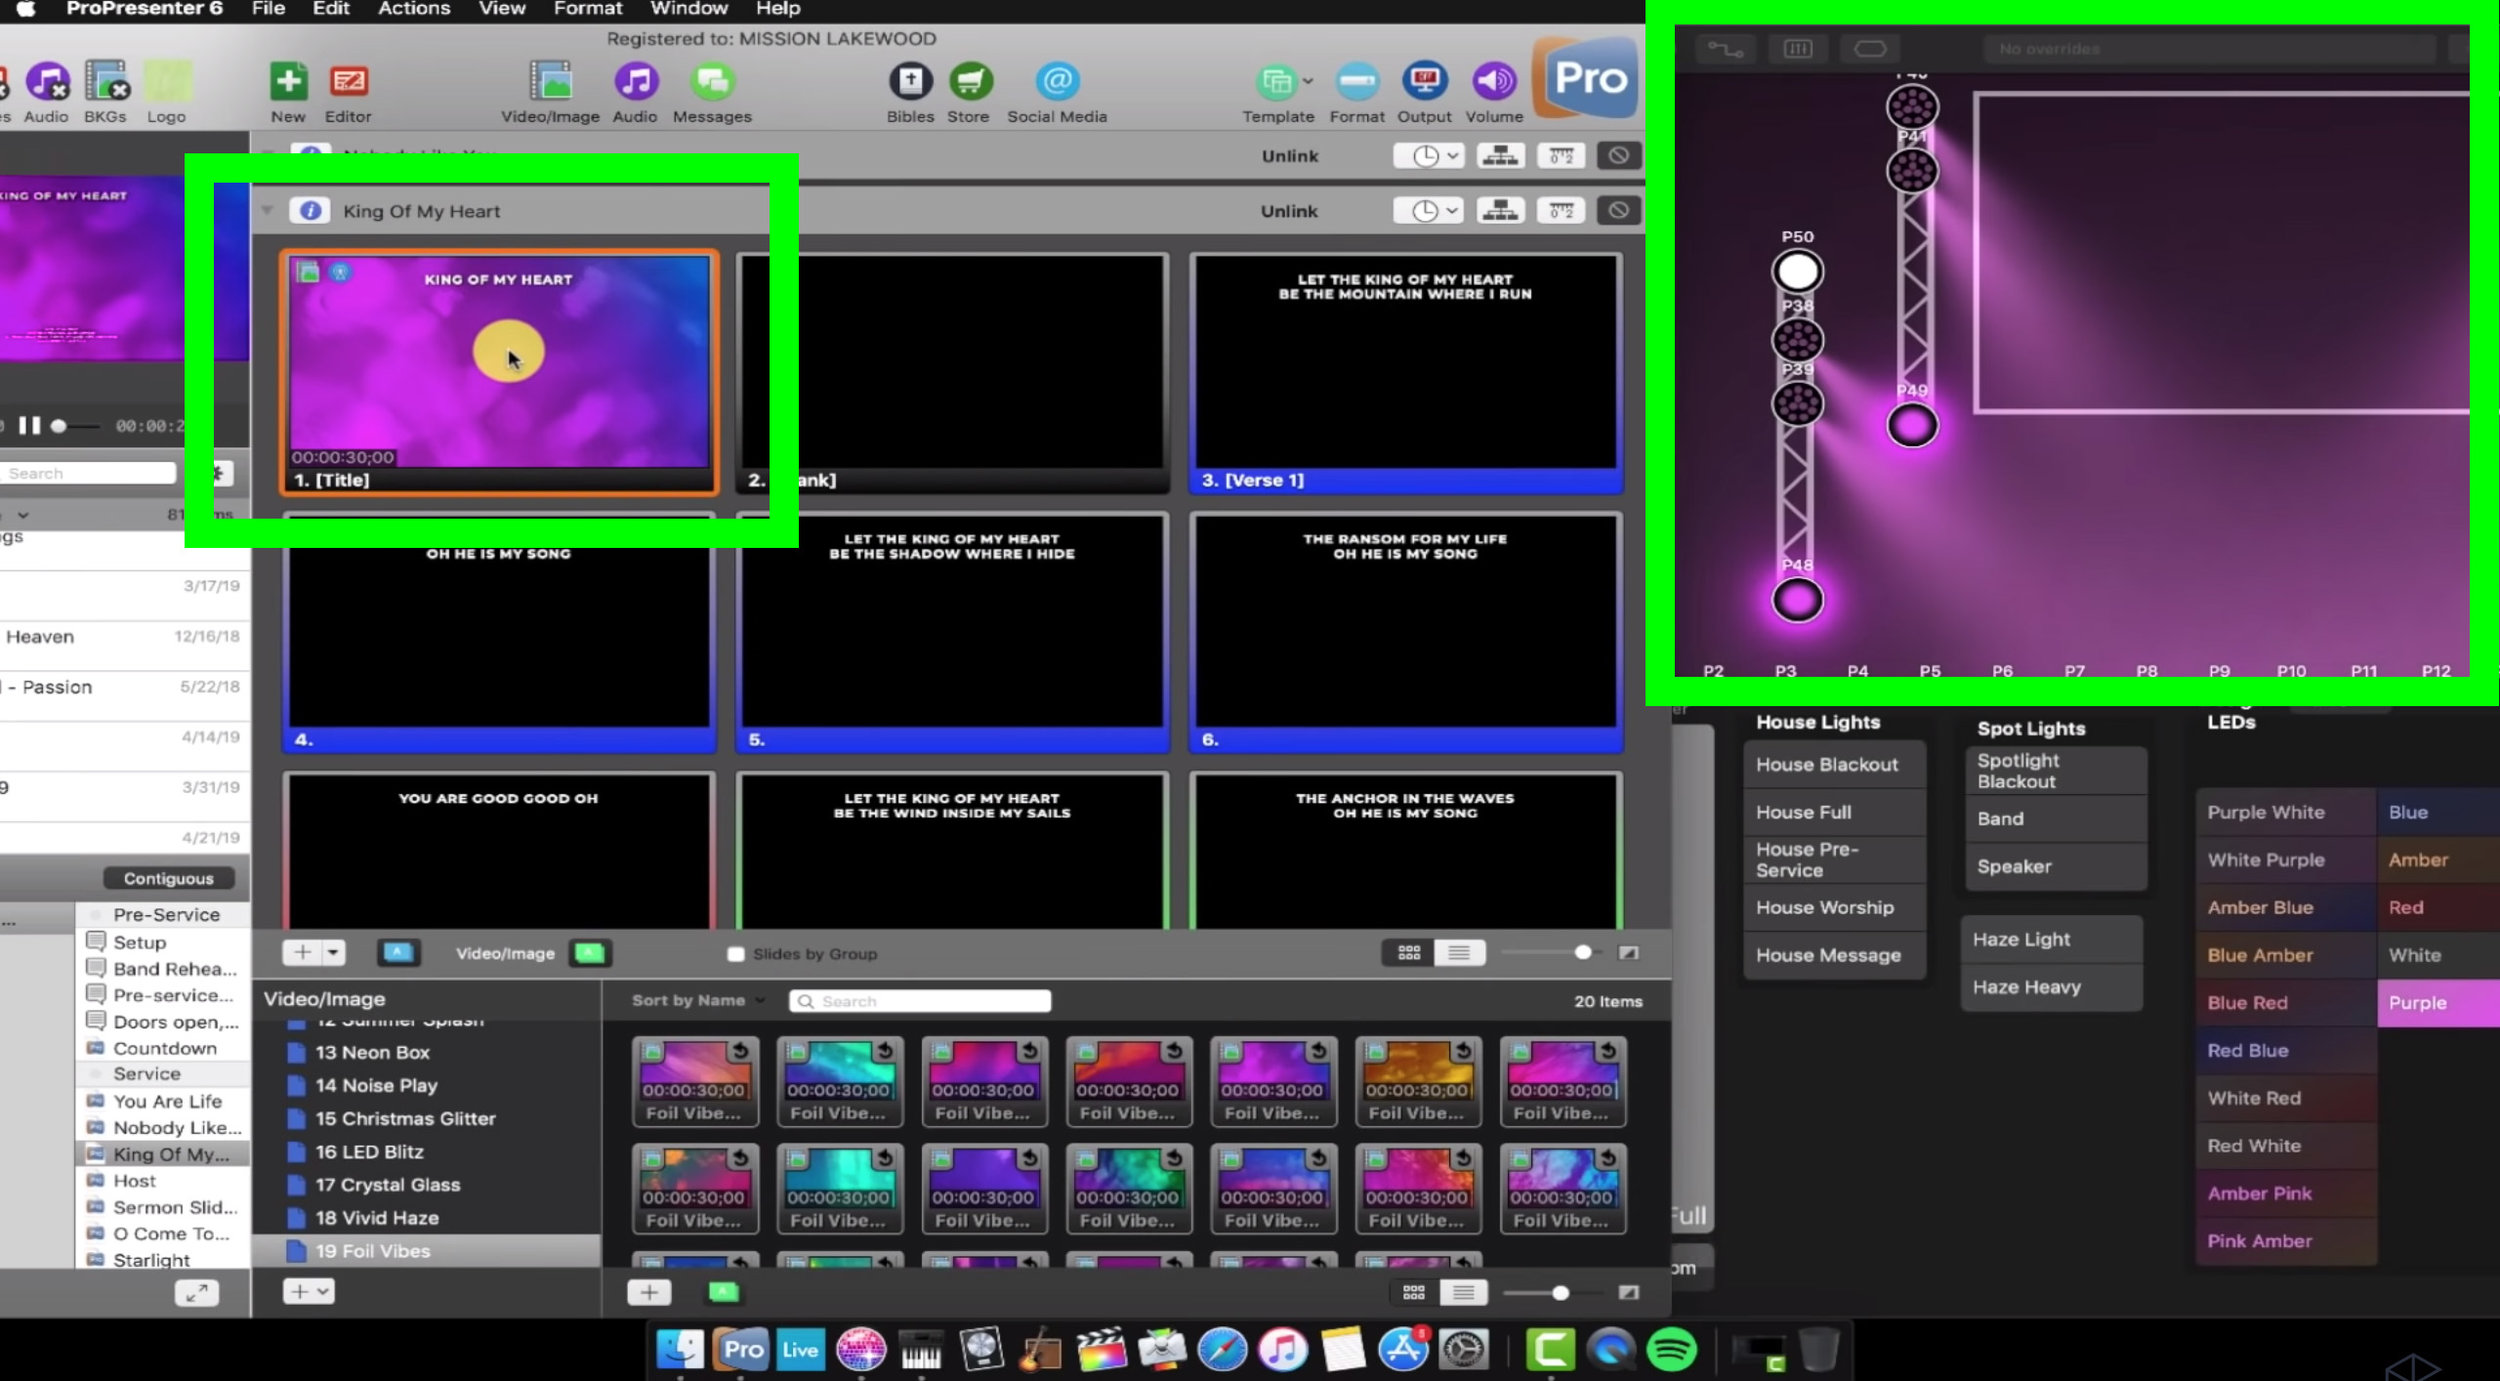
The green square on the left is ProPresenter which you click. The green square on the right shows how the stage lights will look in Lightkey.
Turning on band lights
Now we want to practice turning down the band lights during another cue.
All I need to do is go to the
Band Lights Cue in Lightkey > Right click > External Control > Find the Midi name with is C#8
Then I go to ProPresenter > Find the slide I want it to use it on > Right click > Add Cue > Communications Cue > Midi Note: On

Recap
And that is how you automate LightKey with ProPresenter. You just need to know the midi notes, you need to have them communicate to each other via the IAC driver and then just start adding whatever cues you want.
If you’re interested in continuing to develop your worship leading skills with great classes like this, I’ve created two great ways to help you become an incredible worship leader.
Worship Leaders School: A site and series of courses that covers how to lead engaging worship, how to become a great worship pastor and build systems and teams to grow your ministry.
Worship Tech School: This site is brand new, and will teach you how to be a complete ninja with the latest and greatest software for worship. Sign up to join the waitlist.
Feel free to choose one depending on your role in your ministry. Then choose a time to chat with me and we’ll connect about how these courses can help you.

