Communications

How to Setup Live Streaming for Churches in 2021

In this article, you will be equipped to build a simple, yet professional, live streaming setup for your church. 

 Here’s what will be covered:

  • The Big Picture

  •  Video Capture | How to utilize up to four live action cameras 

  • Audio Capture | How to capture a high-quality mix from a church’s sound console

  • ProPresenter | How to overlay lyrics and graphics

  • Multi-Streaming Services | How to send streams to Facebook, YouTube, Church Online, and a church’s website

  • What to Budget


Before We Begin

A key counterpart to this post is the Worship Ministry Toolkit. Drop everything and download it now! Everything covered in this video is even devoted to a separate page, so the equipment recommended here is easily accessible. 

Need an in-depth and thorough guide to set up this entire live streaming system at your church? Enroll in our Beginner's Guide to Live Streaming for Churches online course. This course has already helped hundreds of churches build a cost effective yet professional live streaming setup. This course provides detailed guides for live streaming, copyright law, improving video setup, understanding ProPresenter to its fullest potential, and creating an amazing audio mix. All of this and more is covered, so enroll today! 

 The Big Picture

Screen%2BShot%2B2021-03-29%2Bat%2B8.04.04%2BAM.jpg

Here's the big picture of the system this article will cover. The Churchfront team has consulted with hundreds of churches over the past year, helping them build custom live streaming solutions for worship ministry. For the vast majority of churches, here are the essential elements needed to create a high-quality stream. 

First, acquire two to four live-action video cameras. 

Second, know how to capture a high-quality audio mix. 

Third, enable lower third lyrics and other graphics or media playback capability. 

And fourth, distribute the live stream to multiple social media platforms and the church's website simultaneously. 

If a church’s system meets these four criteria, that church will be on their way to creating a great experience for its congregation online.

Something to Consider

There are countless ways to accomplish the four steps listed here, but not all lead to a healthy live stream setup. There are so many options for cameras, video switchers, presentation software, streaming software, encoding and multi-streaming platform. It doesn’t take long to seem really overwhelming. Because of this, I've seen so many churches waste a ton of money on the wrong tools. They build a streaming solution that doesn't actually integrate well specifically for a worship ministry environment. Despite all the money they spend on gear or software, their live stream still sounds and looks like garbage. So the recommendations here will save you a ton of time and headache. There’s no need to make your own road. Follow this system. It works! 

Video Capture

The first key to a great livestream setup is to capture two to four angles of live-action video. A minimum of two angles provides a close follow shot for pastors or worship leaders while providing a wide shot to capture the entire stage or room. The second camera also provides a safe shot to switch to, if needed. A third or fourth camera could capture different perspectives from the stage, like a close up on a pianist or drummer. 

There are so many fantastic cameras available today. But in order to build a system at the cost of around $1,000 per camera and lens package, then the Sony A6400 and the Sony E-mount lenses are the cameras to purchase. In order to achieve high quality video, consider looking for a larger camera sensor and better lens optics than what can be found with most camcorders or PTZ cameras.

Screen+Shot+2021-03-29+at+8.04.37+AM.jpg

When it comes to camera sensors, it is best to look for cameras with sensors that have a micro four thirds sensor or an APS-C sensor. A camera with a 35-millimeter sensor or a full frame video camera produces the best results in low light. Since most churches operate in lower light settings, these options can be helpful. The Sony cameras have an APS-C sensor. They’re small, and they’re budget friendly.

Screen Shot 2021-04-02 at 7.10.18 AM.jpg
Screen+Shot+2021-04-02+at+7.10.37+AM.jpg
Screen+Shot+2021-04-02+at+7.10.49+AM.jpg

For test footage of the Sony A6400 in action, check out the YouTube video above. Notice the lack of noise in the image. Sony cameras provide amazing auto focus tracking so the subject will always be sharp in the picture. They also perform great in wide-angle shots. And, important for live streaming, these cameras have a micro-HDMI port that sends a clean video signal to a video switcher, which is the next piece of recommended hardware.

Screen+Shot+2021-04-02+at+7.37.38+AM.jpg

The ATEM Mini Pro is the next recommended piece of video gear. The ATEM Mini has four HDMI inputs, so it can utilize up to four live-action cameras with this switcher. Plug the ATEM into a computer, and it will show up as a single camera source. Instead of managing four different video feeds in a computer, live-action video will be cut by the ATEM switcher down into one single video feed that will feed directly into the streaming software. This reduces the video processing load on the computer. The ATEM Mini Pro also has an HDMI multi-view output, allowing a preview all of the camera angles before switching cameras in a live stream.

To save a few bucks on a video switcher, it’s possible to use the base model ATEM Mini, but keep in mind that it does not have a multi-view output. This could pose a problem for churches with multiple cameras. If it’s not possible to preview the various cameras in the room, the quality of the live stream could suffer. 

Audio Capture

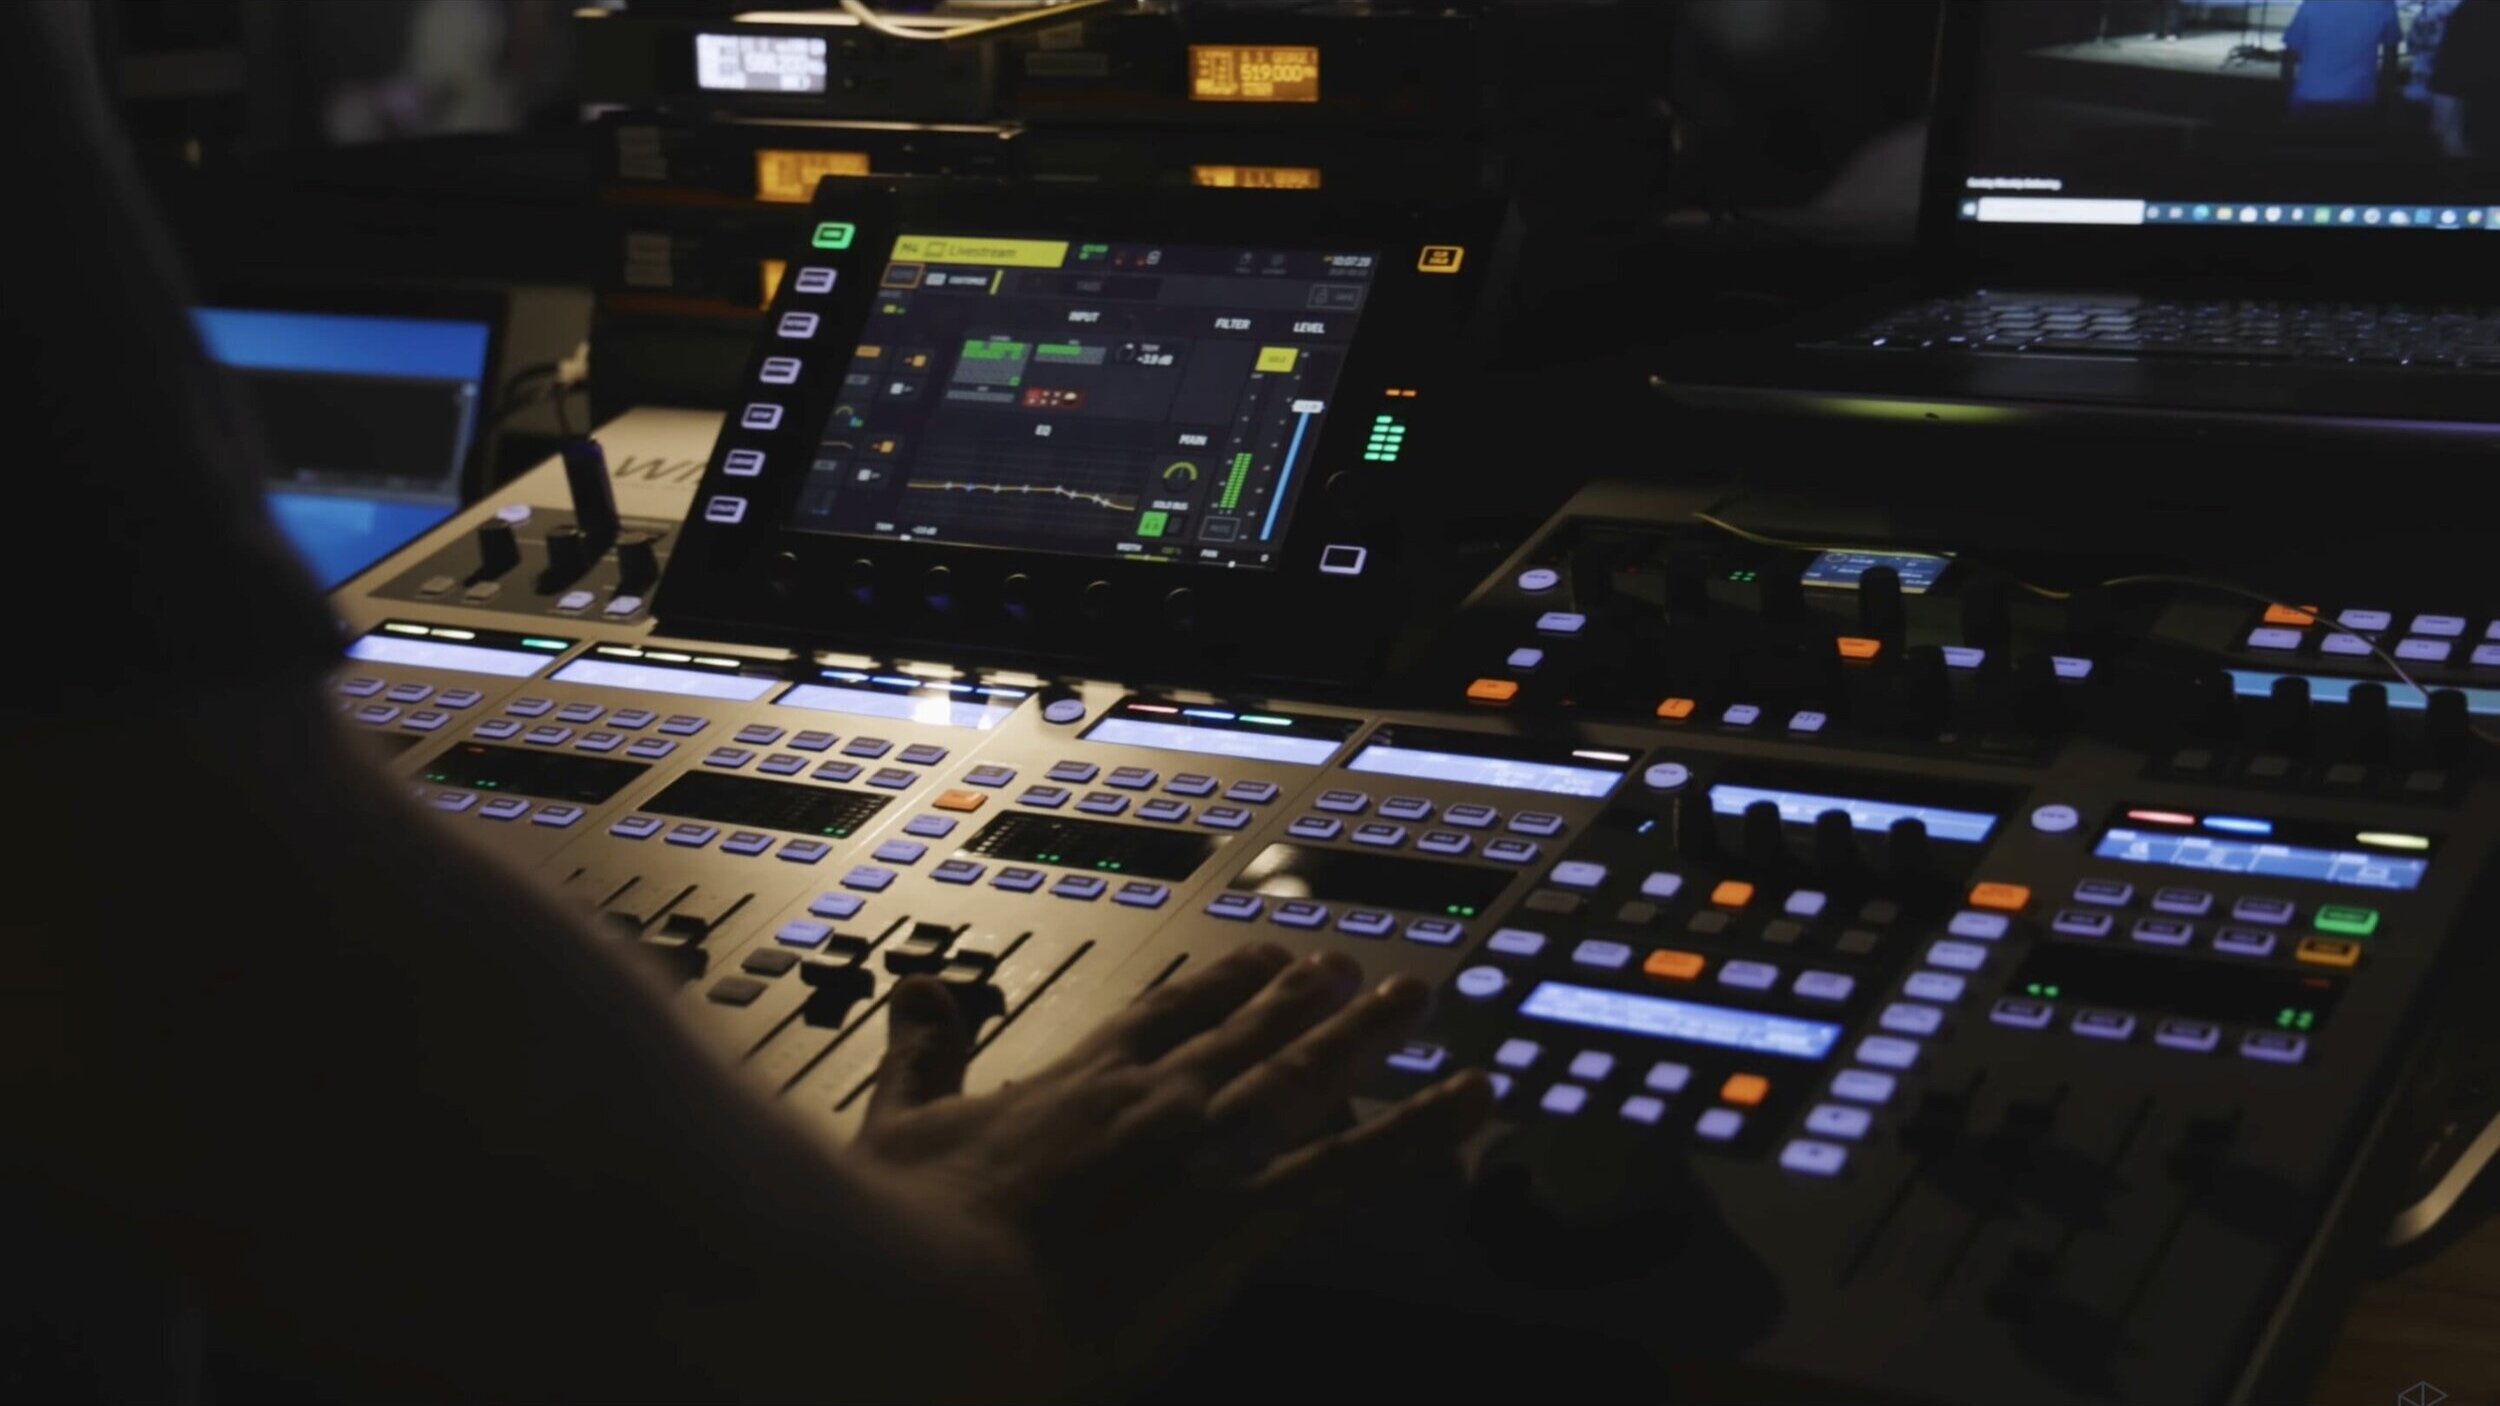
One of the most difficult hurdles for church live streaming is mixing down the worship band. The efficient way to capture and mix clear audio for a stream is to create a post-fader mix bus that will mimic the master mix that for the in-person congregation.

Here is what happens if a post-fader mix bus is created. If a channel is muted in the house mix, it'll be muted in a live stream. Likewise, if a fader is adjusted for the house mix, it's going to be adjusted for the live stream. If the mixer is in the same tech booth as the streaming computer, simply plug the mixer into the computer via a USB cable and it becomes an audio device for the computer. That live stream mix bus will then be routed to the desired USB output channel, where the audio can be captured in the live streaming software. 


For those who use an analog mixing console

Here is the best advice for churches still running an analog sound console: upgrade to digital as soon as possible. That should be the top priority for any tech upgrades a church makes. It's going to be the best bang for any church’s buck for both in-person and online audio. 

For a short-term solution, churches with analog consoles need to get an audio interface to convert the analog sound to digital for the live streaming software. To do this, pull an auxiliary stereo audio feed out of the back of the console and plug the quarter inch or XLR cables into a two-channel audio interface. This will plug into the streaming computer via USB.

Screen+Shot+2021-04-02+at+7.50.47+AM.jpg

Here are some tips to improve an audio mix for live stream.

  1. Have a solid in-person mix built on proper gain staging and channel processing. 

    • Ninety-nine percent of the issues heard on live streams can usually be solved with proper sound reinforcement in getting a good source tone.

  2. Boost or cut the levels of individual channels

    • Even though the live stream comes from a post-fader mix on the console, it’s still possible to boost or cut the levels of individual channels in the live stream independent of what's being sent to the house PA. Depending on the mixer design, find the sends page for the desired channel and adjust the levels accordingly. This provides the ability to boost or cut that channel's send to the live stream mix bus.

  3. Add more reverb to the live stream mix than what is in the room.

    • People online will need to hear that additional sense of space since they're not hearing the natural reverb of the sanctuary or worship center. It's going to sound really dry and almost dead to viewers when they hear vocals or instruments when there is no sense of space along with them.

  4. Apply a compressor to the live stream mix bus.

    • A compressor in this way helps the stream sound loud and consistent. 

  5. If possible, consider sending multi-track audio from the digital mixer into a digital audio workstation or DAW like Ableton Live Pro Tools or Logic Pro.

    • This provides unlimited plugins and mastering tools to help a mix sound professional. This is the same method used by churches like Bethel and Life Church, and it's surprisingly easy to implement in smaller church environments. But keep in mind that it is a great practice for all churches to have a solid live stream mix bus set up on their consoles, even if they are usually mixing in a box. This provides a backup mix in case the DAW or software glitches. 

Screen+Shot+2021-04-02+at+7.49.31+AM.jpg


PROPRESENTER

When ProPresenter 7 came in early 2020, it brought so many amazing upgrades to the software that now ProPresenter 7 is Churchfront’s recommended presentation software for our clients in worship ministry school. 

Screen+Shot+2021-03-29+at+8.08.01+AM.jpg

Before ProPresenter released its streaming feature, streaming applications like Ecamm Live or vMix or OBS were needed tools. Graphics from ProPresenter went to streaming software like Ecamm, vMix or OBS, then those graphics would be laid on top of the live-action video. On top of that, audio feeds still had to be monitored. But now, live-action footage and audio can be sent directly into ProPresenter. Simply overlay lower thirds lyrics, scripture, and any other graphics directly into ProPresenter, and send the final live streaming video feed to social platforms or multi-streaming services directly from ProPresenter. 

To see a basic overview of how ProPresenter does this, check out the YouTube video above and be sure to enroll in our Beginners to Live Streaming for Churches course

Multi-Streaming Services

ProPresenter completes the final stages of bringing together video and audio sources, compressing them down into a final product that can be delivered to online audiences. But how should the final product be delivered? 

We recommend using a multi streaming service like Restream or Resi. Restream or Resi allows churches send live streams to multiple destinations at once. This a must-have feature to allow congregations to watch streams on their preferred platform, whether it's Facebook, YouTube or Church Online. 

Restream is the budget friendly, multi-streaming service costing around $40 per month. 

Resi plans start at $69 per month. But most churches will need the starter web plan at $139 per month. Resi is considered the premium route, offering a resilient streaming protocol. In a nutshell, this means that with Resi, a church’s stream will never experience buffering even with a momentary lapse in internet connection. A church using Resi could lose internet for multiple seconds or even up to a minute, yet their online audience won't notice any interruptions or buffering. This happens because Resi delays the stream in their cloud by about two minutes before distributing the video to the various social platforms.

Resi is going to cost more, but direct integration with ProPresenter and a resilient streaming protocol provides a tight, reliable stream. ProPresenter can easily stream to Restream via Restream's RTMP server. Once a Restream account is created, simply copy and paste the RTMP URL and key into ProPresenter, and the stream will be ready to go live. 

Once the live stream is online using one of these methods, consider using the free Church Online platform by Life Church.

Church Online is a free website builder that allows churches to host live streams with a better user experience, chat, and prayer functionality. The Church Online platform can provide a distraction free environment for a church's live stream. Social media platforms are designed to keep users scrolling through content and scrolling through the newsfeed. This can create short retention times from viewers on Facebook or YouTube.

Driving people to a platform like Church Online taps into the space where people are already hanging out while keeping them undistracted. It is a great way for new people to discover a church. That's why Churchfront recommends leveraging the Church Online platform as one more place to host a stream for people who do not have social media accounts yet desire to experience a church’s live stream.

Budget

Let's talk about budget. It's one of the most important determining factors for a church's live streaming setup. The system recommended in this post will cost just under $3,000 for two live-action cameras, a video switcher and all the accessories a church needs for the video capture portion. Most churches already use ProPresenter and a digital mixing console. If a church is using an analog console, an audio interface will cost $100. Finally, the multi-streaming services recommended will cost either $40 a month or a $140 a month, depending on the provider. 


That’s it, the ultimate guide to church live streaming for 2021! 


Remember to download the Worship Ministry Toolkit for a convenient list of all the gear and software mentioned in this article and enroll in the Beginner’s Guide to Live Streaming for Churches for more in-depth guidance. And don’t forget to subscribe to Churchfront’s YouTube channel to be equipped with all the latest content. 

The Ultimate Guide to Worship Tech Part 1 | Audio

The Ultimate Guide to Worship Audio Tech Pt. 1

This is a three-part series where I’ll show you the tools you need for seamless audio, video, lighting and automation during your church service without needing a huge budget or team.

In part one, I’m covering audio and going over:

  • Digital mixing consoles

  • Digital stage boxes

  • In-ear monitors

  • Digital audio networking

After reading this guide to worship tech and the other two below, you'll have a strong foundation for your growing worship ministry.

Part 2: Lighting and Display

Part 3: Automation and broadcast

Guide to Worship tech 1

Audio System

First off, I want to stress the importance of having a robust and functioning audio system which is critical to the entire service. Any interruptions or errors during service can distract the congregation or even hinder them from participating. If you only look into one of the tools we recommend today, check out the audio system–it’ll go a long way in improving your service and allowing your congregation to worship fully.

Digital Mixing Console

Our first recommendation is the digital mixing console. It’s the heart of your church’s sound system, allowing you to process, route, mix and record audio. Old analog mixers can still get the job done, but you’re missing out on so many features that could enhance the sound of your worship. 

Most digital mixers come with EEQ, reverb, and delays all built into the internal computer so you don’t have a bunch of separate pieces of equipment laying around. Having all of those abilities at your finger-tips makes it easy to create high-quality mixes.

Presonus Audio Mixer.JPG

Another great thing about going digital is that most of them can record to USB drive or SD card, so you can plug in your computer with a digital audio workstation (DAW) and produce an entire worship album. For all of the built-in capability and ease-of-use, you’d expect these pieces of tech to go for over $10,000. While you used to pay that much, you can get some great quality digital mixers for less than $2,000!

Some of our favorite consoles here at Churchfront include the:

While each of these options have their pros and cons, you really can't go wrong with any of them. Implementing a digital mixing console will help you lay a great foundation for you to build on.

Digital Stage Box

Our next recommendation is the digital stage box. It’s the next step in building your audio tech once you have a digital mixing console. 

These stage boxes typically have 8-32 input channels, and 8-16 outputs; your musicians plug in their mics or instruments and can set up their own in-ear monitoring all on their own. Everything gets routed back to the mixing console via an ethernet cable, so you don’t have to use bulky, unreliable analog snakes anymore. Put 2 on either side of the stage and your musicians plugin and are good to go.

Audio Stage Box.JPG

In-Ear Monitors

Once you’ve got your digital mixing console and stage box, you can now fully harness in-ear monitors for your team. While floor wedges work fine, in-ear monitors reduce stage noise, making it easier for the engineer to mix and protects the hearing of your musicians.  

Implementing in-ear monitors is a sure way to boost the excellence of your worship band because you can play click tracks, keeping everyone in-time and grooving. 

Jake Gosselin w In-ear monitors.JPG

With your digital console and stage box in place, there are a few options on how to equip your team with in-ears. For a really in-depth look, check out Churchfront’s Ultimate Guide to In-Ear Monitors

Here are a few recommendations for setting up in-ear monitors

Option 1: Headphone amp

A super cheap and easy way to go is purchasing a headphone amp. These small boxes convert the XLR cable from the stage box output to a headphone cable for your musicians. This option is really affordable, around $20 to $50, and works great for stationary musicians like drummers or guitarists. Most of the digital mixing consoles come with apps so your musicians can EQ their own mix as well.

Option 2: Wireless in-ear monitor system

If you’ve got money to spend, you can buy a wireless in-ear monitor system.  Of course, how much you spend will translate to how much quality you receive, but you can purchase systems anywhere from $200 to $700 a person–it all depends on the needs of your specific team.

Option 3: Combine the options

You can use the headphone amps for your stationary, backline musicians and invest in the more expensive wireless systems for your leaders and singers. I love this method because it allows you to tailor your setup to the exact needs of your team and congregation. That’s the benefit of building your audio setup this way–you start with the foundation and build up from there.

Digital Audio Networking

After implementing a digital mixer, stage box and in-ear monitors, you’d already ahead of most local churches. You could stop there, but if you want to go further, here’s the rundown on digital audio networking.

Since you’ve got your in-ear monitors set up and ready to go, you’d probably want to run a click track over a DAW (our favorite is Ableton Live) for your musicians. But you’d quickly find that it’s difficult sending multiple channels of audio from the laptop into the mixing console.

You could go the traditional route and purchase a large audio interface which plugs into the computer via USB, sending your analog outputs to the sound console via digital snake, but why go through all that trouble after you just modernized your audio tech?  

With digital audio networking, you can send multiple tracks of audio from the laptop right into the mixing console over one, simple ethernet cable. It’s honestly a no brainer: you eliminate a bunch of connections, the sound quality is better and you have greater audio routing flexibility.

Digital Audio Networking Setup.JPG

There are a number of popular networking protocols such as Waves’ SoundGrid and AVB, but we recommend Dante by Audinate.  

How to get set up with Dante

  • To get up-and-running with Dante, you’ll need to purchase the Dante sound card for the mixing console, this comes in at about $600.

  • Then, you’ll need to install the $30 Dante sound card app for each computer you plan on using in the Dante network. With the sound card app, you’ll have access to, essentially, a virtual audio interface for your computer with 64 inputs and outputs of audio.

  • Plug in your Dante-enabled devices to your local network over an ethernet cable, and you’re ready to go–instant flexibility and ease-of-use for your musicians and sound team.

Recap

As you grow your worship ministry and as you implement more of the latest worship ministry tech, a sound system that includes these parts will be more than ready to accommodate your team’s growth and provide an incredible worship service for your congregation.  

To jumpstart this process and discover how to grow as a worship leader and team, fill out this form and schedule a call with me or someone else on the Churchfront team.

We’d love to connect, learn more about your ministry and talk about what it would look like to work together. 

Feel free to reach out to us to get started.

How to Communicate with Your Worship Keyboardist

Common terminology

My goal in this is to give you and your keyboardist a common terminology so that you can communicate more effectively, identify what sounds you want and produce a well designed performance that evokes powerful emotions and connections in your church community.

1. The “warm” sound

The first word I want to address is the word “warm.” Stuff is called warm all the time but it's hard to quantify what that means. 

A warm sound is a pad that has this nice low-mid energy. It's not getting in the way, it's not sitting on top of what the electric guitars, vocals, bass or the kick drum might be doing. It's serving as a foundation underneath everything.

It doesn't have any of that bright sizzle on top that can distract from quieter moments. Instead, it adds a feeling of connectedness and intimacy. 

Protip: One of the really important things about finding a warm a pad is to make sure it's not too static. You want there to still be some motion and energy–what we call a little bit of modulation.

Check out the example below to hear what I’m talking about.

Listen to the warm sound

2. The “bright” sound

Next, let's talk about the bright sound. This is the opposite side of the warm sound. 

When I think of bright, we're talking about stuff in the higher frequency spectrum that's actually maybe above or right alongside what the guitars are doing. That has a lot of energy on the top end that's perceived as more aggressive, more powerful and it's more complex harmonically. You might still be playing in the same range on the keyboard but there are harmonic frequencies on top of it that add a little bit of extra energy.

Oftentimes with these bright synth pad sounds, you're still serving as the foundation to the mix, holding everything else together, but you're able to dynamically lift as your drummer switches to the high hat or starts washing out cymbals and as your electric guitarists start playing with more intensity. This increase in brightness from the pad goes right along with that; still serving as the foundation but rising as everyone does too. 

Listen to the bright sound

3. The “shimmer” pad

Lastly, let's talk about the most overused buzzword right now in the worship space–the shimmer pad.

You can have a shimmery texture or quality to your pad sounds which does something really specific in the mix, but it's really easy to overuse this kind of effect and overwhelm what your vocalist or your guitarist is doing.

It’s still worth using, but you have to make sure that you clarify why you're using this type of sound and where this type of pad sound actually sits in the mix.

Check out the example below to hear the proper balance that doesn’t overwhelm everything else.

Listen to the shimmer pad

Effects

Now let’s talk about how a couple simple effects from software like Mainstage or Ableton can greatly increase the quality of your music and make them sound more like today's top worship songs. 

1. Reverb effect

First off, I want to talk about reverb. If you're a guitarist, I'm sure you're probably familiar with the effect that reverb can have. You can use it on keys in the same way.

Reverb adds a sense of size, depth and space to your sound. It can soften up the initial impression of what you're playing, create some room and increase the hang time of your chord. 

Listen to the reverb effect

2. Delay effect

Now, let's talk about delay. All the guitarists discovered delay in 2002, and keyboard players are just getting around to it now.

In the same way that you can change the character and the rhythmic complexity of an electric guitar with delay, you can achieve a lot of the same cool effects with piano.

This is commonly used on some slow songs where you'll hit a chord on the one, and let the delay trail sort of add that extra oomph to it. You can also use it when you're playing the piano as a lead instrument, to give you an extra bit of memorability to a bridge or something like that. 

In really powerful worship moments, it can also add more texture and make the piano sound a little bit more interesting. 

Listen to the delay effect

3. Shimmer effect

Lastly, I want to return to shimmer. We already talked about shimmer when it comes to a pad, but you can also apply shimmer as an effect to any sound that you have. 

When I’m playing the piano all I have to do is turn on the shimmer reverb. The shimmer will swell in behind what I'm doing and then swell back down. If I'm moving through chords, it's never overwhelming the initial playing, and it feels really organic and natural.

It's a really great effect to give your keys players because it's got a nice production value element to it, it adds an ethereal ambience and it doesn't require a lot of theory knowledge to use. As long as you're not overplaying, it's going to make you sound like you know what you're doing.

Listen to the shimmer sound

Recap

So those are six fundamental terms for you and your keyboardist. My hope is that it empowers both of you to create a powerful experience for the people you’re leading. 

If you want to take the next step with this training and dive deep into equipping and empowering the keyboardist in your worship band, then check out Worship Leader School. David has created an entire masterclass exclusively for members that will:

✅Give you a deep dive into the effects that we touched on today.

✅ Show you an in-depth tour of all the gear and software for this setup.

✅Explain how to communicate and work alongside your keyboard player so you have smooth transitions in worship

I’d love to chat about how this class can help you grow as a worship leader. 

Feel free to setup a call here.

Talk soon.

How to build a church website with Squarespace

The ultimate video guide to building a church website with Squarespace.

Zero web design experience required.

Welcome to the most thorough online course on church web design you will ever find on the web. I've spent countless hours filming this click-by-click tutorial so that anyone can build a beautiful and effective church website regardless of their web design experience. All you need is a laptop or desktop and a solid internet connection. No coding knowledge or experience required.

It is my strong conviction that 21st-century church leaders must understand how to build and maintain a website. Web design is no longer a niche skill for nerds who understand complicated coding. It's a fundamental aspect of modern communication. Your church website is the hub of your church's online presence. As a brick and mortar institution, your website will be the first interaction potential visitors have with your church before they bother visiting on a Sunday. For folks who are regulars at your church, your church website will be the place they go for relevant content and information regarding church life. Websites are no longer a luxury, but a necessity for churches in the 21st century.

I'm on a mission to rid the internet of lousy church websites. Sadly, the church generally lags behind the rest of the world when it comes to best practices in marketing. A lot of pastors shove the idea of marketing aside as too "worldly" because of its business-like nature. The fact of the matter is, marketing is about catching peoples attention and guiding them toward a goal or solution that will help them. For businesses, that means grabbing the attention of potential customers to influence them toward buying. In the church, our hope is to influence such a ways as to lead them to Christ. Sharing the gospel is marketing. The church has the most important marketing job in human history because we have the ultimate "product." Yet for some reason, pastors are complacent about their church's marketing approach and efforts.

In no other time in history has it been this easy to reach millions or billions of people with the gospel through online platforms. Whether we as church leaders like it or not, that's where people are spending all their time now. All of their attention is on the super computer that fits in their pocket. One of the most fundamental steps of engaging with an audience is having a place to call "home" online that is not controlled by the algorithms of social media. That's why your church website is so important. That's why it needs to be awesome.

If you are looking to build a new church website for your church plant, or maybe you want to completely redesign your existing church website, this free course is for you. In it, I will show you how to build a church website from scratch using Squarespace. I would argue that Squarespace is the best web design platform for churches, regardless of size. I know of many mega churches with mega budgets who have blown mega dollars on having a web design agency design their website. The user experience of these sites are horrible and I cannot imagine how many potential visitors these churches are mission out on because whoever designed them cared more about what looks cool rather than user experience best practices. I have 110% confidence that any church leader can build an amazing and effective website his or herself by following the steps outlined in this course. In it, I apply all of the best practices of web design to a local church context. Follow the steps outlined in this video and you will see an increase of first-time visitors at your church. When potentials visitors search Google for churches in your town, you will begin ranking toward the top of organic search results.

What are your waiting for? Let's get your new Squarespace website up and running in just a few minutes. Below I have outlined the different sections for quick navigation. Simply click the timecode links and they will bring you to the corresponding sections of the video.

Course outline And quick links

0:18 - Meet Jake! As well as the benefits of this course


3:00 - Course Overview


4:30 - Deer Creek Church: A Case Study


7:36 - Design Philosophy


11:23 - Examples of famous churches and their websites


13:19 - The website as an evangelistic tool


13:41 - Branding Content- Logos, Fonts, and Color Palette


17:21 - Professional Photos and Video on a Budget


21:28 - Stock Photography Resources


23:28 - Site Map


24:26 - Let’s do this!


24:55 - Select a template and sign up for a Squarespace account


26:36- How to login and logout of your Squarespace website


27:35 - Create a custom Squarespace domain


29:20 - Editing “General” Settings


31:36 - Editing “Website” Settings


34:43 - Website Logo and Title


36:25 - Introduction to the Style Editor


45:25 - Understanding Navigation


47:05 - Adding and Deleting Pages


47:56 - Deleting Demo Pages


49:47 - Creating Pages and Basic Site Navigation


55:18 - Adding a Banner Image and Video


58:50 - Adding a banner headline and Call to Action


1:04:35 - Worship times and location


1:11:41 - Purpose and Design Approach of the Plan a Visit page


1:12:18 - Building the Plan a Visit Page


1:29:14 - Leadership


1:37:17 - Beliefs


1:39:30 - Contact


1:48:21 - Ministries Page


1:51:38 - Serve Page


1:54:32 - Life Groups Page


1:57:44 - Hosting your sermon audio with Soundcloud


2:05:21 - Creating a Sermon podcast on iTunes


2:13:32 - Creating a Sermon podcast on Google Play


2:17:14 - Events Page


2:20:52 - Giving Page


2:24:24 - Cover Pages


2:31:47 - Upgrading your billing plan


2:33:00 - Link your primary domain


2:35:00 - Squarespace Support


2:36:03 - Optimize URL settings


2:37:13 - Announcement Bar


2:39:06 - Third-party Squarespace plugins

How to build a church website in less than five minutes

Would you believe me if said you can build a brand new church website in less than five minutes? In a few moments, that is what I want to show you. Of course it is not going to be a complete church website, but it will be functional. I have built dozens of websites using Squarespace. It is the best website builder for churches because of it’s ease of use, beautiful design, and low cost. I want to show you how quick and easy it is to start building your own website with Squarespace. All you need is a laptop or desktop and a solid internet connection. Here are 3 steps to building your church website in less than 5 minutes.

Step 1 - Go to squarespace.com and select your website template

Find a desktop or laptop computer. Go to squarespace.com and click the “get started” button. Here you can browse a list of template options for your websites. The best templates for church websites are Bedford or Hayden. Select your template and follow the steps to setup your free Squarespace account. In less than a minute you have a fully functioning site. There is a lot of customization work to be done, but at this point, the site could go live if you enable your Squarespace subscription. It is insane how easy and quick it is to do this.

Step 2 - Create your custom Squarespace domain

Before you start customizing your site, create a custom Squarespace domain, so you have a memorable url to navigate to while building your new site. Click “settings,” “domains,” and customize your built-in domain by replacing the auto-generated name with your church name. To log out of your site, navigate to your account profile and select log out. To log back into your site, navigate to your custom Squarespace domain and press the escape key.

Step 3 - Customize your website

By now you are beginning to learn how easy it is to work within Squarespace. On the left side of the window, you can add or delete pages, change the graphic design, and customize other settings. I recommend spending a few minutes watching tutorial videos at support.squarespace.com. There you will the learn the basics of how the website builder works. Try uploading your church logo to the new site by selecting “design” then “title and logo.” Next, delete all of the demo pages you won’t be needing by navigating to pages and selecting the trash can icon. Add a custom banner image and a headline to your home page. Finally, underneath the banner add your service times and a map of your church.

What you've seen in this brief demonstration is why I love Squarespace. I did not have to know any code, and it took just a few minutes to get the basics of church website up and running. Realistically it takes a day or two to input all of the relevant content into your new website and have it be fully functioning, but there is no need to hire a professional web designer or developer to do this. Do not underestimate your ability to build and maintain a website. What is keeping you from building your new church website with Squarespace? What questions do you have about creating a church website? Let me know in the comments below.

The best website builder for churches

A few years ago, building a website meant finding and hiring a professional web developer to get the job done. It could cost thousands or tens of thousands of dollars and making any changes or updates to the site construction would be burdensome and costly. If you were in the market to build a new website for your church, then this was intimidating and frustrating.

Today in 2017, things are a lot different. Website builders have come a long way. Building your own website has never been easier. No longer does your church need to lay down a huge chunk of cash and wait months for a new outsourced website. Now you can have a new website up and running in less than 10 minutes. 

My number one recommendation for building a church website is Squarespace. I have been designing websites with Squarespace for over 5 years. I am continually blown away with how easy they make it to create a professional website that meets all of the latest design trends. A lot of website builder companies have come and gone. There are even companies dedicated to being website builders for the church. Unfortunately, their features pale in comparison to Squarespace. Over the past decade, Squarespace has proven itself as a business and dominates the website builder market. Here are 5 reasons why it is the best website builder for your church.

Reason #1 - Easy to use

I personally feel that every pastor needs to understand basic web design. It’s the modern day version of the printing press. If you consider yourself a communicator, you must understand how to build and maintain a website. Squarespace is perfect for this because you do not need to learn how to code. It is so intuitive that you could just learn as you go or simply spend a few minutes watching some basic tutorial videos. I always like to say, if you have the capability of logging into Gmail to check your email or Facebook to make a status update, then you have all the technical capability you need to build a website with Squarespace.

Reason #2 - Beautiful design

Squarespace dominates the website builder world when it comes to beautiful templates that meet all of the latest design trends. You never have to worry about whether or not your website is out of date because Squarespace does all the hard work to keep things fresh. They are regularly coming out with new templates and refining older ones. If you decide to update your template to a whole new look within Squarespace, it takes only a few minutes to accomplish.

Reason #3 - Automatic Mobile Optimization

All of Squarespace’s templates come with mobile optimization built in. You do not need to edit a separate version of your website in mobile. I would even argue that having a website on Squarespace completely eliminates the need for a church app since the user experience of Squarespace in mobile is better than most apps.

Reason #4 - Easy integration with ministry tools

If you need online giving, event registration, other forms on your website, Squarespace makes it extremely easy to do, especially if you use church management software like Planning Center. If you need to host sermons on your website, embedding your sermon podcast player or video player takes seconds.

Reason #5 - Low Cost

Churches should not skimp on their digital communications budget, but the reality is cost is always a factor. With Squarespace you have the most powerful website builder at an insanely low cost. Depending on the size of your site, a month-to-month subscription costs only $16-$26 a month. You do not pay any large setup fees and you can cancel at any time. If your church cannot afford that, you have some bigger issues to deal with.

I could go on about why Squarespace is the best website builder for your church, regardless of size. I have seen too many churches both large and small waste thousands of dollars outsourcing web development and ending up with sites that may look cool but they have terrible user experience. Do not waste your time and your church’s money. Build your church website using Squarespace.

P.S - This is not a paid endorsement of Squarespace. I am just passionate about churches making the right choice with their online communications. 

10 ingredients of an effective church website

Your website is the front door to your church. Before anyone visits your church on a Sunday, they are going to check out your site. Here are ten vital ingredients for building an effective church website. You can see an example of each of these ingredients being utilized by a site designed by Churchfront. Visit www.deercreekchurch.com.

Ingredient #1 - A homepage using the hero layout

The hero layout is characterized by a full-width banner image or video that fills up space on your home page above the fold. The “fold” is toward the bottom of the page before you start scrolling down. The imagery you use should be vibrant pictures or footage of your church community. This allows people to assess what type of community you are within seconds. The key is to show people in this imagery.

Ingredient #2 - A concise headline on the homepage describing who you are and how you can help

Concise headlines also help people understand who you are and how you can help them within seconds. Remember, you do not have their attention for long. The home page is not where you should be placing your church’s complete mission and vision statement. People do not have time to read that.

Ingredient #3 - One call to action

Assuming you want your website to encourage more first-time visitors, then create one call to action that says, “plan a visit.” Do not make “give” your call to action. When first-time visitors walk into the door of your church, do you immediately ask them to give? Of course not, but for some reasons many churches make this mistake by making the give button the primary call to action by putting it front or center and in the upper right-hand corner.

Ingredient #4 - Plan a visit page

Immediately upon someone visiting your site, you want to function as their guide. The best way to do this is to create a plan a visit page, which is linked to your call to action button on the home page. On this page, walk people through the process of where to park, how to check in kids, what they can expect in worship, and how they can get plugged in.

Ingredient #5 - Mobile-friendly design

This is obvious, but I still see church websites that are not mobile-friendly. About 70% of internet traffic is mobile. Make sure your site is mobile optimized. An easy way to tell is your top navigation collapses into a hamburger menu, and everything scales to the proper size and layout so your text and graphics are still easy to read.

Ingredient #6 - Less information

Less is more with website design, especially on your home page. You only have seconds to communicate the vital information people need to visit your church. When they see paragraphs of texts or dozens of photos, they are immediately going to check out and watch funny cat videos on Youtube. Those are way more interesting than an overloaded church website.

Ingredient #7 - Simple navigation

Keep your navigation simple. There shouldn’t be more than 6 or 7 items in the top layer or your header navigation, and you do not need a billion items in your dropdown folder. These are a pain to navigate in mobile. If you have a bunch of ministries in your church, create one page for ministries and on that page create links to individual ministries, rather than listing them all in your navigation.

Ingredient #8 - An excellent leadership page

A lot of people will visit your leadership page. Have some professional but casual photos of your church staff. You can also include brief bios. In all of the church websites I have designed, the leadership page is one of the top most trafficked pages. People want to know who they have to listen to for an hour on Sunday and who is going to take care of their kids. Make sure your leadership page makes a good first impression.

Ingredient #9 - Easy access to sermons

Another highly-trafficked page is the sermon page. Whether it’s your congregation wanting to listen to a sermon they missed or potential new visitors wanting to preview sermons, you must make it easy for them to quickly navigate to your sermon media. Include links to your podcast feeds so they can subscribe.

Ingredient #10 - Online giving integration

This is another feature that’s vital on your website for people attending your church. Most giving platforms easy integrate into your website. I love giving interfaces like Planning Center and PushPay because they are easy-to-use, mobile optimized, and only take seconds to setup a one-time or recurring gift.

What else would you add to this list of ingredients for an effective church website? Let me know in the comments below.