church sound

Waves eMotion LV1 Mixing System | Worship Ministry Setup

In today’s post, we’ll be giving you a brief overview of our setup of the Waves eMotion LV1 mixing system.  Here’s what we’ll cover:

  • What you need to get started

  • Overview

  • Building Templates and Soundcheck

Waves Mixing Board Shot.JPG

What You Need to Get Started

Like with any mixing board, whether they’re digital or analog, you’ll need some gear to get started with Waves. 

  • A host computer for the Waves eMotion LV1 software

  • Physical inputs and outputs for instruments, mics, etc.

  • Audio interfaces (probably one front of house and one on stage)

  • Network cables for connectivity

  • Touchscreens to take full advantage of Waves’ UI

  • Additional recommended gear

    • Create a Waves account to get access to all of their plugins

    • A DAW for recording, playback, and further connectivity

This sounds like a lot, but keep in mind, a lot of these things you should already have if you use a mixing board.  All of the I/O’s work the same as they would for any other mixing board, so experienced sound techs shouldn’t have a problem getting setup.

Touch Screens.JPG

Overview

Similarities to Other Mixing Boards

Because the Waves UI is set up exactly like other mixing boards, anyone with experience as a sound engineer or a tech should be very familiar with Waves.  If set up properly, we even think it could be more beginner-friendly for new volunteers than other tools. Since the UI is all virtual, and not analog like the Behringer X32, it can be completely customized to what your team needs, not being constrained by any physical buttons, switches, or sliders.

Going forward from here, you’ll see the real similarities to traditional mixing boards, but also the advantages of using a virtual one like Waves.

Setup Tab

On the setup tab, you can find the inventory page which allows you to view and choose which devices are being used.  There’s a place to define the network, sample rate, and see which computers are part of the system. Any mixer or user interface settings can also be changed on this page.

Setup Tab.JPG

Patches

The patching page is going to be similar to other digital boards, so most functions will be familiar to you.  Like other boards, you’ll pick which inputs and outputs go to which inputs and outputs. The great thing about Waves is that you can choose whether a channel is mono or stereo, and still only take up one slider.  

Mono Stereo Sliders.JPG

Sessions and Scenes

Once you’ve set up your patches, you can start a session.  Within each session, you can have multiple ‘scenes’ where pre-set levels are recalled.  This is great for whole songs or even parts of songs where the tech needs to change multiple effects at once.  For further control and customization, you can make certain effects ‘safe,’ so that they won’t be change when switching through scenes.

Session Scenes Tab.JPG

Channel Setup and Customization

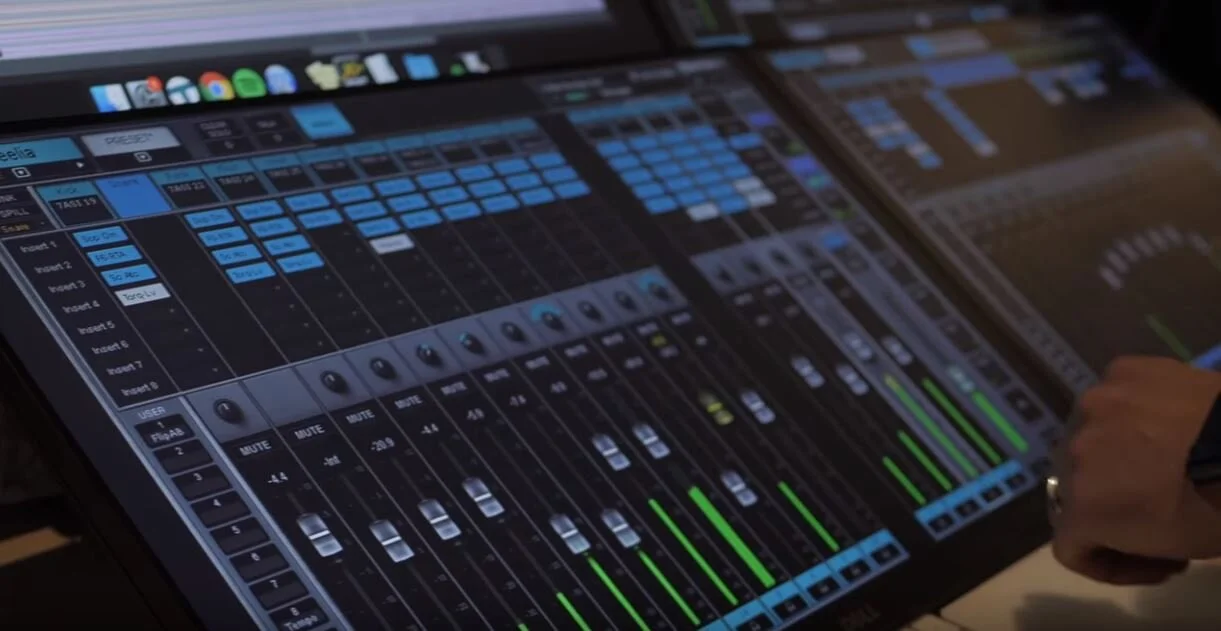
Like with other mixers, Waves allows you to flip through different layers to navigate through channels, groups, AUX’s, etc.  Additionally, Waves also allows you to create custom layers to essentially build any setup you want.

There are some obvious traits already in place in the UI, such as the master fader, which is always present on the right-most channel.  The left side of the virtual board is where you get some really great customization. You have a number of assignable buttons that can be tied to pretty much any effect or command you like, such as tap tempo, mute, or even recalling scenes.

Shifting through modes, you can flip through different screens to access dynamic EQ, AUX/effects, and routing.  Each of these modes gives you the ability to see what’s really happening under the hood, and enables you to customize each aspect of the software.

Channels and Effects

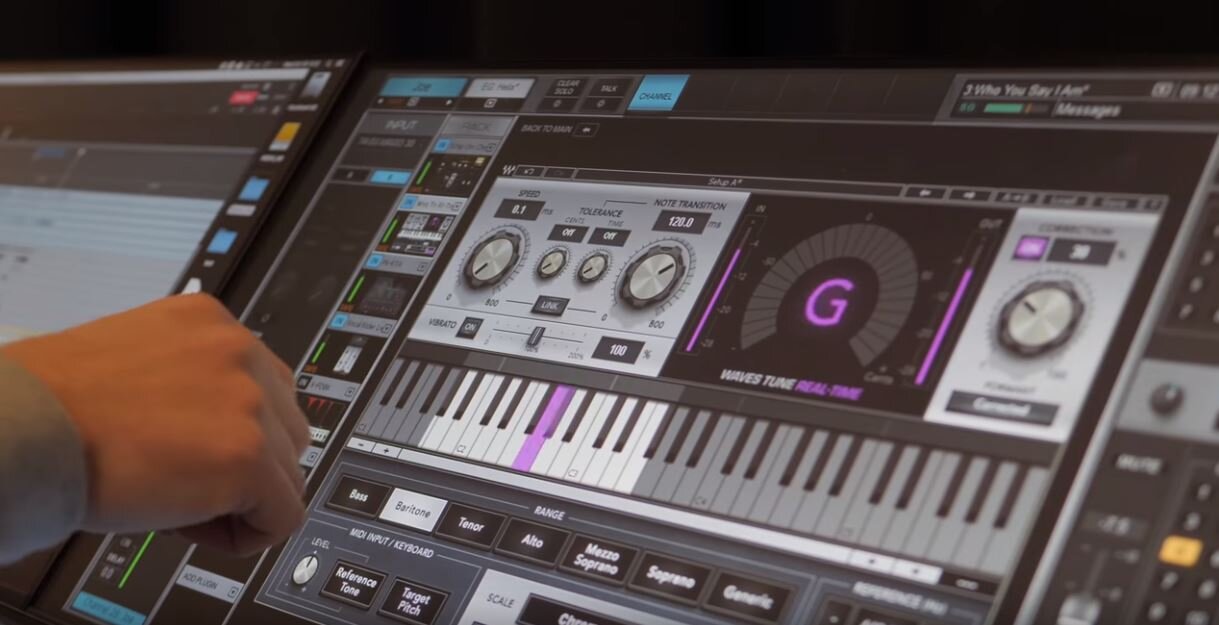
Within each individual channel, you’ll have access to basic effects like EQ and compression--just like any other board.  However, Waves allows you to add in up to eight compatible plugins. You’ll be able to change each effect and save your preferences for each channel, giving you a lot of flexibility when you’re building for a set or service.

Plugins Shot.JPG

Building Templates and Soundcheck

Templates

Like with other systems, Waves gives you the ability to create your own templates.  Depending on your week-to-week needs for the band and pastor, you can build and save a template so you don’t have to customize Waves for every service each Sunday.  Simply call up the template and you’re good to go.

Virtual Soundcheck

One of the great features of Waves is the ability to do a virtual soundcheck.  You can record and playback anything you want through your DAW, and any new volunteers can practice mixing and learning queues.  You don’t have to have your worship team on-site, or risk bad mixing during service in order to train new members of your team.

Volunteers.JPG

Conclusion

Overall, Waves is a great place to start if you want to build a Gospel-centered and tech-savvy worship ministry because it gives you the customizability, ease-of-use, and intuitiveness to craft a strong, seamless service. Check out our 10 tips for better church sound and tips for achieving better mix in worship to round out your experience.

If you want to learn more about how you can grow your worship ministry and work with us, let’s talk. Fill out this contact form and we’ll hop on a call to see what we can work out.

How to Communicate with Your Worship Keyboardist

Common terminology

My goal in this is to give you and your keyboardist a common terminology so that you can communicate more effectively, identify what sounds you want and produce a well designed performance that evokes powerful emotions and connections in your church community.

1. The “warm” sound

The first word I want to address is the word “warm.” Stuff is called warm all the time but it's hard to quantify what that means. 

A warm sound is a pad that has this nice low-mid energy. It's not getting in the way, it's not sitting on top of what the electric guitars, vocals, bass or the kick drum might be doing. It's serving as a foundation underneath everything.

It doesn't have any of that bright sizzle on top that can distract from quieter moments. Instead, it adds a feeling of connectedness and intimacy. 

Protip: One of the really important things about finding a warm a pad is to make sure it's not too static. You want there to still be some motion and energy–what we call a little bit of modulation.

Check out the example below to hear what I’m talking about.

Listen to the warm sound

2. The “bright” sound

Next, let's talk about the bright sound. This is the opposite side of the warm sound. 

When I think of bright, we're talking about stuff in the higher frequency spectrum that's actually maybe above or right alongside what the guitars are doing. That has a lot of energy on the top end that's perceived as more aggressive, more powerful and it's more complex harmonically. You might still be playing in the same range on the keyboard but there are harmonic frequencies on top of it that add a little bit of extra energy.

Oftentimes with these bright synth pad sounds, you're still serving as the foundation to the mix, holding everything else together, but you're able to dynamically lift as your drummer switches to the high hat or starts washing out cymbals and as your electric guitarists start playing with more intensity. This increase in brightness from the pad goes right along with that; still serving as the foundation but rising as everyone does too. 

Listen to the bright sound

3. The “shimmer” pad

Lastly, let's talk about the most overused buzzword right now in the worship space–the shimmer pad.

You can have a shimmery texture or quality to your pad sounds which does something really specific in the mix, but it's really easy to overuse this kind of effect and overwhelm what your vocalist or your guitarist is doing.

It’s still worth using, but you have to make sure that you clarify why you're using this type of sound and where this type of pad sound actually sits in the mix.

Check out the example below to hear the proper balance that doesn’t overwhelm everything else.

Listen to the shimmer pad

Effects

Now let’s talk about how a couple simple effects from software like Mainstage or Ableton can greatly increase the quality of your music and make them sound more like today's top worship songs. 

1. Reverb effect

First off, I want to talk about reverb. If you're a guitarist, I'm sure you're probably familiar with the effect that reverb can have. You can use it on keys in the same way.

Reverb adds a sense of size, depth and space to your sound. It can soften up the initial impression of what you're playing, create some room and increase the hang time of your chord. 

Listen to the reverb effect

2. Delay effect

Now, let's talk about delay. All the guitarists discovered delay in 2002, and keyboard players are just getting around to it now.

In the same way that you can change the character and the rhythmic complexity of an electric guitar with delay, you can achieve a lot of the same cool effects with piano.

This is commonly used on some slow songs where you'll hit a chord on the one, and let the delay trail sort of add that extra oomph to it. You can also use it when you're playing the piano as a lead instrument, to give you an extra bit of memorability to a bridge or something like that. 

In really powerful worship moments, it can also add more texture and make the piano sound a little bit more interesting. 

Listen to the delay effect

3. Shimmer effect

Lastly, I want to return to shimmer. We already talked about shimmer when it comes to a pad, but you can also apply shimmer as an effect to any sound that you have. 

When I’m playing the piano all I have to do is turn on the shimmer reverb. The shimmer will swell in behind what I'm doing and then swell back down. If I'm moving through chords, it's never overwhelming the initial playing, and it feels really organic and natural.

It's a really great effect to give your keys players because it's got a nice production value element to it, it adds an ethereal ambience and it doesn't require a lot of theory knowledge to use. As long as you're not overplaying, it's going to make you sound like you know what you're doing.

Listen to the shimmer sound

Recap

So those are six fundamental terms for you and your keyboardist. My hope is that it empowers both of you to create a powerful experience for the people you’re leading. 

If you want to take the next step with this training and dive deep into equipping and empowering the keyboardist in your worship band, then check out Worship Leader School. David has created an entire masterclass exclusively for members that will:

✅Give you a deep dive into the effects that we touched on today.

✅ Show you an in-depth tour of all the gear and software for this setup.

✅Explain how to communicate and work alongside your keyboard player so you have smooth transitions in worship

I’d love to chat about how this class can help you grow as a worship leader. 

Feel free to setup a call here.

Talk soon.

The Ultimate Gear List for Portable Churches on a Budget

The Ultimate Gear List for Portable Churches on a Budget

In this article, I am going to share with you the secret sauce of portable equipment that won’t destroy your church’s budget, and in fact, will make your setup and tear-down process a breeze and it will cost a lot less than what you are expecting.

10 tips for better church sound


Listen to the podcast session


Achieving a solid mix in a church worship gathering can be a struggle for a lot of worship tech teams. It’s difficult to find audio engineers with the knowledge, experience and most importantly, ear for the craft of mixing a worship band. Most churches cannot afford to hire a full-time or even part-time audio engineer. The responsibility of running sound is often left in the hands of well-intentioned volunteers who may be tech savvy but are novices to the art and science of mixing audio.

I recently sat down with Eric Olson, one of the audio engineers at Red Rocks Church. Eric started as a volunteer on the production team at Red Rocks, and over the past couple of years, he served his way up to being a contracted audio engineer. I have heard his mixing on numerous occasions since he works at the campus I attend. I have also played in the worship band at Red Rocks multiple times while he was running the front of house mix. To say he knows what he is doing with a mixer board is an understatement. He has not even graduated college, but he is creating a fantastic mix for the 3,000 people that attend the Littleton campus every weekend.

I asked Eric to share ten tips for better church sound. I wanted to create a simple guide for aspiring audio engineers or worship leaders responsible for training sound volunteers at their church. For those of you who are seasoned worship leaders and audio engineers, these tips will seem basic, because they are! I am convinced that church sound would be significantly better if more tech volunteers implemented these fundamental tips. Church sound can seem complicated and overwhelming, especially for those new to the responsibility. Keep it simple by taking Eric’s advice outlined below.

1. Know how your equipment works

Church sound engineers must be the resident expert on all aspects of the sound system. Understand what each piece of gear does by reading manuals or looking up tutorial videos online. Know the signal flow of your system. How does signal go from the front of house mixer to the stage for monitors, or to the main speakers? Parts of this system inevitably fail or malfunction. The sound engineer must be able to troubleshoot issues quickly.

2. Be a team player

The relationship between the audio engineer and worship and production teams is crucial. Often the audio engineer is the liaison between the band and the rest of the tech team. Over-communicate with one another. Use basic social skills. Be intentional about the tone you use as you communicate with the band. Remember you are on a team.

3. Learn the music

Audio engineers should know the music just as well as the worship leader. As a worship leader myself, I am super bummed when the guy or gal mixing the sound has no clue how the song should sound. If you are an audio engineer, you must be listening to the songs your worship leader has up on Planning Cetner. Listen for important parts of the songs like guitar solos. Know how loud the backing tracks should be. Know who is singing lead or harmonies. Listening to worship albums should be a part of your daily routine, not because it makes you super spiritual, but because you should be developing an ear for the genre of music.

4. Use your ears

With the rise of affordable digital consoles, the mixing experience has become increasingly visual. You can see all of your EQ, dynamics, and effects parameters on beautiful and bright displays. Remember that just because certain parameters look right on your mixer, doesn’t mean it will sound right. Maybe you found a Youtube video on how to EQ a kick drum. Don’t expect that copying the exact parameters will yield the same results in your church. Use your ears to fine tune the sound to your context, rather than sticking to someone else’s template.

5. Always be learning and evaluating

Being a lifelong learner is the key to success in every aspect of life. Continuously refine and hone your craft. Seek out advice and wisdom from more experienced audio engineers. Take advantage of online resources whether they are Youtube videos or podcasts on mixing.

6. Gain structure

The first step of sound processing as the signal from an instrument or vocal enters the board is setting gain structure. There are multiple methods and techniques for how you set gain structure that we do not have time to cover here. The important thing about gain is to make sure you have a strong enough signal coming to the board from your instruments or vocals, but not too high that it causes clipping and distortion. Learn more about gain structure here.

7. Compression

Affordable digital boards like the Behringer X32 come with a built-in compressor or dynamics control. When listening to professionally mixed music versus something you recorded on your phone with the voice memos app, you may notice that the volume levels of professionally mixed music are much more consistent whereas the levels on low-quality recordings are all over the place. Compressing vocals so that the lower volume sounds increased and the higher volume sounds decreased significantly increases the quality of a mix. In a live setting, your worship leaders vocals can drastically change volume if they move away from or toward the microphone, or if they a variation of vocal parts that are high and low in their range. A compressor smooths this all out. It’s also a hand tool to use on instruments like the kick drum so that the loudness of each strike of the kick drum sounds consistent. To learn more about how to adjust the parameters of a compressor or noise gate, click here.

8. EQ

Equalization plays a huge role in achieving an excellent mix. The key here is to reduce bad frequencies rather than boosting good ones. Use tools like the high-pass filters to get completely rid of low muddy frequencies on instruments that never need them. To learn more about EQ best practices, click here.

9. Effects

The most common effects you will hear in a professional environment are reverb and delay. Effects have the potential to both enhance and destroy a mix. Do not overdo it. If you are new to mixing, start with only applying a little bit of reverb with a second or two of decay. Eric has two types of reverb when he mixes. The first is his default reverb that has a one-second decay. It’s on almost all the time on the vocals. The second reverb has a four-second decay. He uses this reverb during appropriate climaxes of songs. Delay can also enhance a mix, but be especially careful with it. Most mixers come with a tap tempo feature to allow you to set the tempo of your delay to match the tempo of the song.

10. Volume

The most intensely debated aspect of church sound is volume. People in your church will inevitably complain about the volume. Some complain it’s too loud. Some complain it’s too quiet. Make sure you and your church leadership are on the same page about the volume and stick to that standard. Often when people complain about the volume of church sound, they are complaining about issues of EQ or some other mixing parameter that you can quickly adjust. EQ is probably the most common because poor EQ can make instruments sound harsh or piercing. Before you turn down faders, examine the other parameters explained above. A few additional notes about volume. Make sure the vocals can be heard above the instruments so people can sing along. As we already mentioned, know the music so you can make slight adjustments to instrument levels based on the style of the song.

I’m grateful for Eric taking the time to share these ten tips for achieving better sound. While this article is by no means a comprehensive guide to mixing sound for church worship services, hopefully, you can take away some valuable fundamentals for increasing the quality of your mix. Do not over-complicate this process. Keep it simple and always work towards refining your craft.